
A woman at the coffee shop scrolls through her phone. She pauses on a manicure photo. The dots aren’t white on red. They’re something else entirely.
Polka dots never really left. They just got bored of themselves. Now artists are flipping the script—dark nails with metallic specks, clusters of varying sizes, negative space tricks that make the dots float.
Color reversal changes everything. Try deep midnight blue with soft pearl dots. Or matte black with glossy black circles that only catch light at certain angles.
These subtle shifts feel grown-up. Professional, even.
Texture adds another layer. Some dots sit flat. Others rise slightly, catching the light like tiny domes.
Mismatched sizing creates movement. Your eye travels across the nail without knowing why. It’s clever design dressed up as playfulness.
That’s the sweet spot most people haven’t discovered yet.
Polka Dots With Reversed Colors: Dark Base, Light Dots
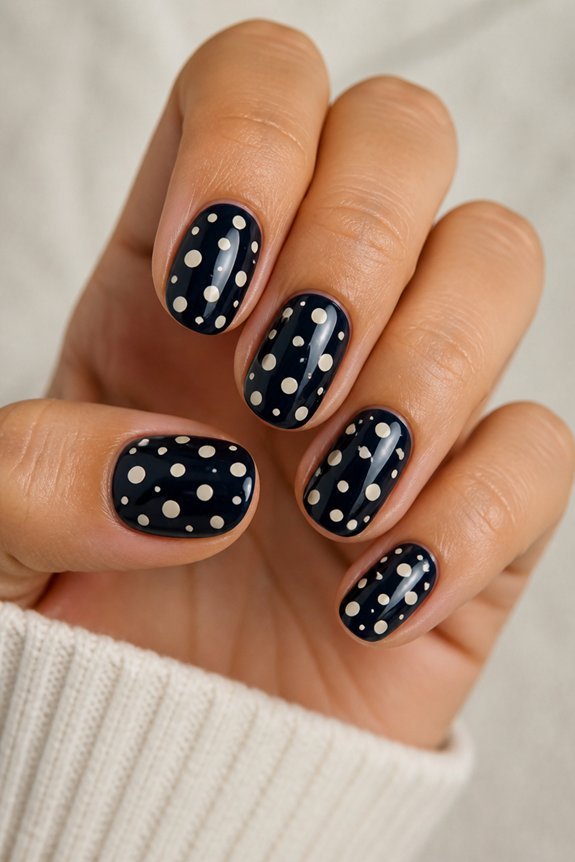
Tired of the same old nail art? Flip the script. Dark bases with light dots feel instantly fresher than classic white-and-black.
Try deep burgundy. Try charcoal. Try midnight blue. Any of these work. Dot them with white, cream, or soft gold. The result reads polished, not playful. Office-appropriate? Absolutely.
You’ll need a dotting tool. No tool? Use a bobby pin. Work fast—dark polish dries quicker than you think. Thin layers keep edges crisp. Sally Hansen’s Complete Salon Manicure covers well in one coat for both colors.
Want extra depth? Matte the base. Gloss the dots. Texture makes it interesting. Skip the metallics if subtle’s your goal. This look proves one simple swap changes everything.
Also Read: 12 December Nail Ideas: Festive Designs Your Friends Will Copy
Polka Dots With Mismatched Sizes for Textured Depth
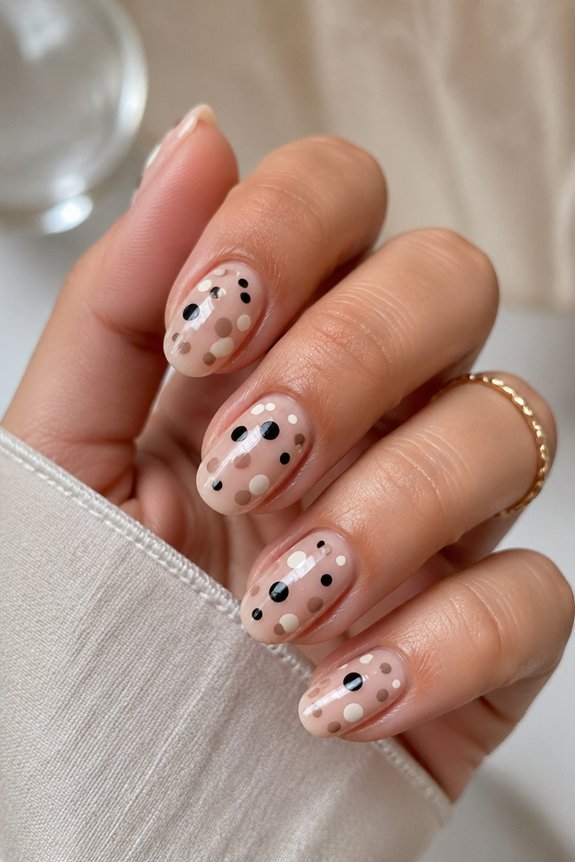
Tired of flat, boring polka dots? You can fix that in minutes.
Mix your dot sizes. That’s the trick. Paint one big focal dot. Cluster tiny ones around it. Suddenly your nails have depth. They have movement. They catch the light differently than uniform patterns ever could.
Grab dotting tools in 2mm, 4mm, and 6mm widths. Gel polish works best here—it keeps edges crisp and clean. Try Gelish or OPI for opaque, punchy colors. Marcus Chen, a pro nail tech, swears by this: “Mismatched sizing gives you texture without chaos.”
You can go monochrome. You can clash colors. This technique bends to whatever mood you’re in.
Also Read: 10 Black French Tip Nails: Modern Twists on a Timeless Manicure
Ombré Backgrounds With Gradient Polka Dots
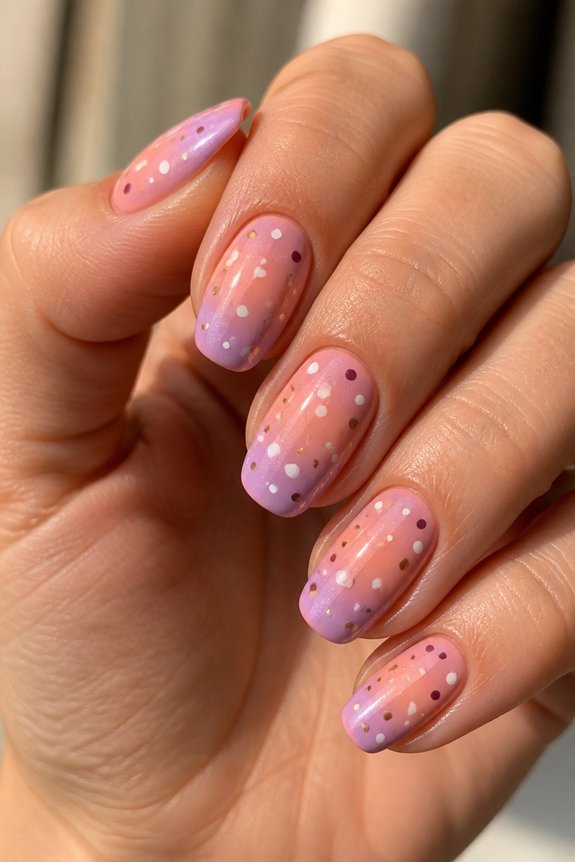
You’ve probably layered colors before and loved the result. Ombré with polka dots takes that idea further. You’re blending two or three shades across the nail. Then you’re adding dots that seem to float on top.
The gradient usually moves diagonally, dark to light. Place your dots carefully. They should follow the color flow, not fight it. Gel products work best here. They give you clean blends and lasting wear. Your nails end up looking polished but never boring.
This style fits special occasions perfectly. You get elegance without trying too hard.
Negative Space Polka Dots on Nude Bases
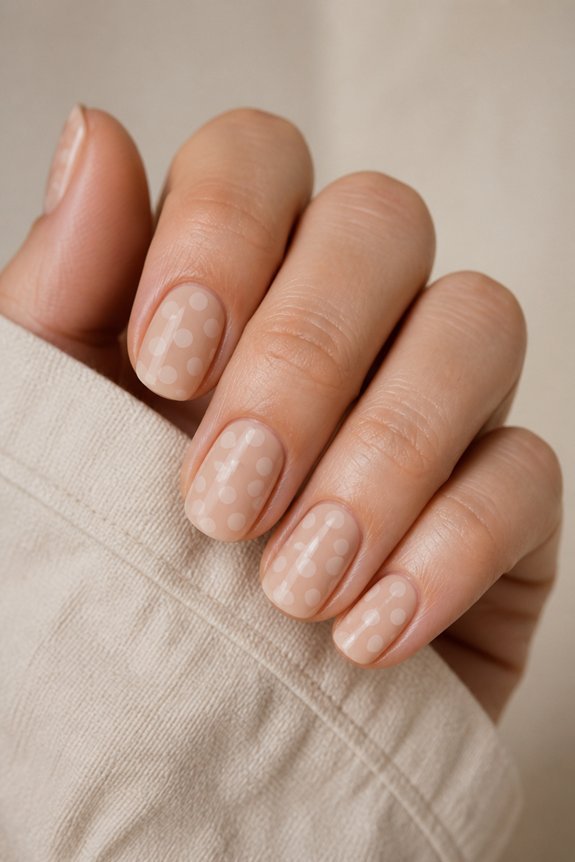
Love a clean look but bored with solid color? Negative space polka dots are your answer. You get polish plus breathing room. It’s modern. It’s intentional. It feels effortlessly chic.
You need a nude base first. Warm beige works. Cool pink works too. Try OPI’s “Bubble Bath” or Essie’s “Ballet Slippers.” Both give you that neutral canvas without fighting your dots. Use a thin brush or dotting tool. Place your dots strategically. Leave gaps. Let the nail show through.
Where exactly should those dots go? Near your cuticles. Along the edges. Clustered at the tip. The empty space matters as much as the polish. Nail artist Jennifer Kim puts it perfectly: “Negative space designs demand confidence.” She means you can’t hide behind full coverage. Every placement choice shows.
Your dot colors change the whole mood. Matte black feels graphic and bold. Metallics add subtle flash. Translucent shades create depth without weight. Perfect for the office. Perfect for dinner after. You’re polished, not trying too hard.
Metallic and Chrome Polka Dot Accents
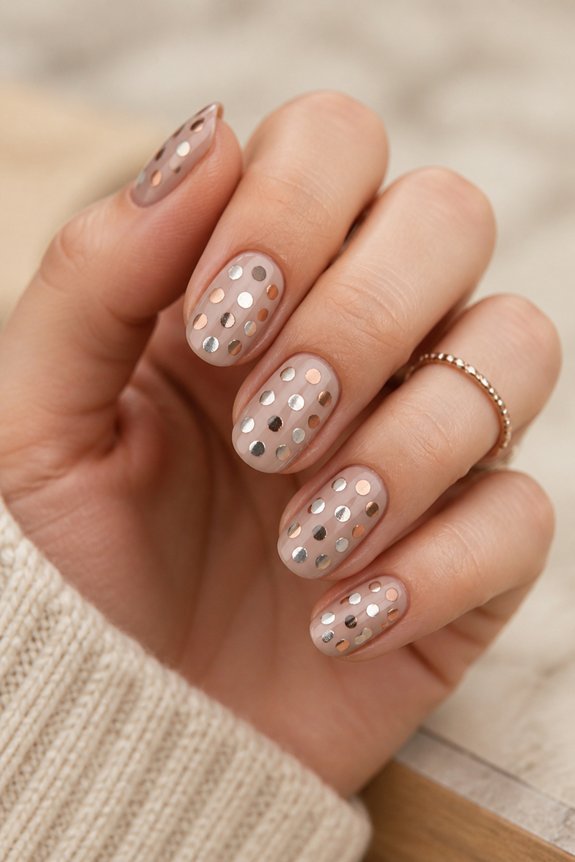
You want nails that catch the light? Start with metallic dots.
Gold and silver accents pop against nude or pastel bases. Chrome powders mixed into gel polish create mirror finishes that shift as you move. Layer them over matte polish for instant contrast. Try holographic dots for rainbow effects that change throughout your day.
Sarah Chen, a pro nail tech, swears by placement. Scattered dots feel fresh and modern. Organized patterns look polished and upscale. Brands like Gelish and OPI sell pre-made metallic designs. Or mix chrome powder with clear gel yourself. That custom route lasts longer than regular polish. You’ll need a steady hand though. For flawless results, book a professional.
Glitter-Filled Polka Dots for Extra Sparkle
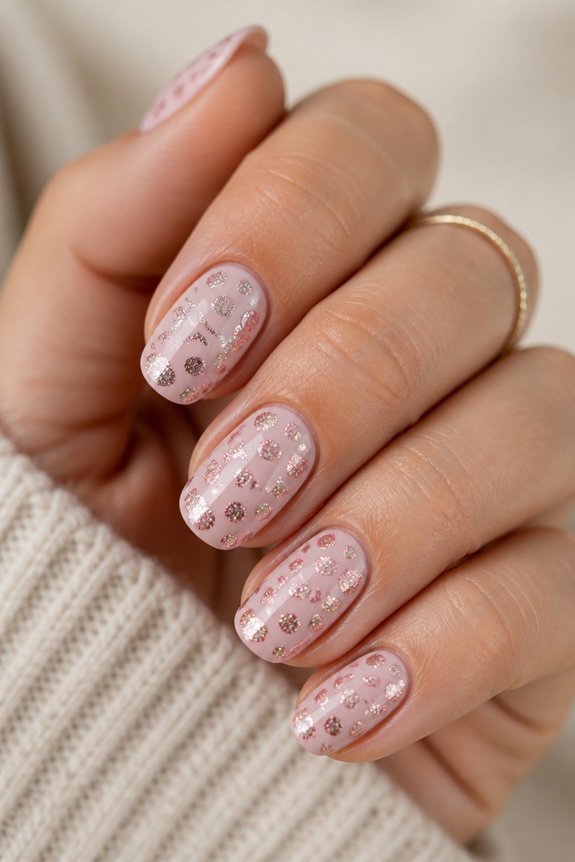
Ready to take your dots beyond basic? Glitter-filled polka dots catch light from every single angle. You’ll get instant dimension without the mirror-finish look.
Here’s how it works. You start with your base coat. Then you mix gel or liquid formula with fine glitter—chunky works too. Cure it under UV light. Done.
Color pairing matters. Try gold glitter against deep jewel tones. It feels luxurious. Silver or holographic on nude bases? Subtle but stunning. Nail tech Maria Chen swears by this trick. She says glitter dots add texture that solid polish just can’t touch.
For products, grab Seche Vite gel formulas or Sally Hansen Diamond Strength. They last. Seal everything with a glossy topcoat. Your sparkle will pop even more.
Mix Polka Dots With Lines and Geometric Shapes
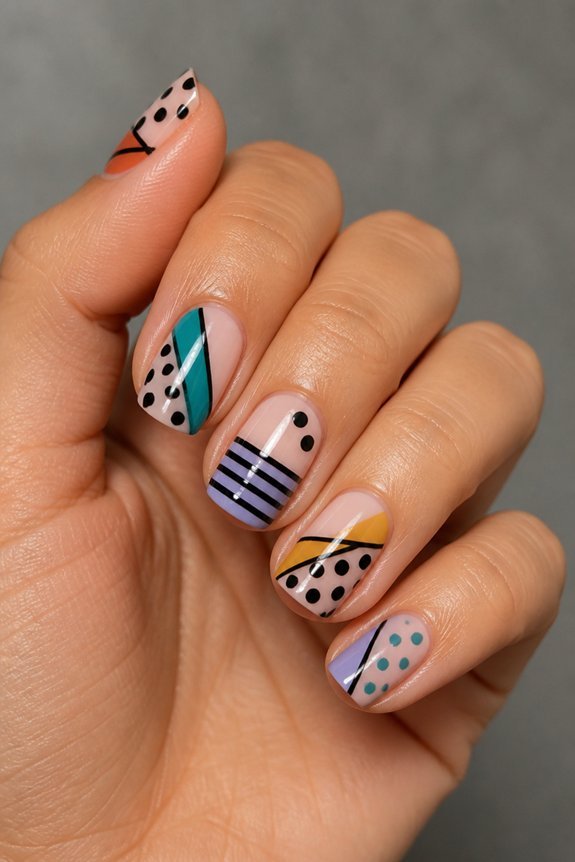
Tired of polka dots that fall flat? You’re not alone. The trick is pairing them with lines and shapes that give your nails real personality.
Try this. Paint thin metallic stripes next to your dots. The contrast feels instantly sophisticated. Add triangles or hexagons around a central dot cluster. Suddenly you’ve got architecture on your fingertips.
Nail artist Sarah Chen gets it right: “Mixing shapes prevents monotony while maintaining cohesive design flow.” Start with your base color. Switch to a fine-tipped brush for the details. OPI’s gel line holds up well if you’re building something complex.
Leave some breathing room. Negative space between geometric sections keeps the eye moving. Scatter dots inside diamond shapes. Alternate chevron stripes with polka dots. Play with matte and glossy finishes on different elements. Your simple dots just became gallery-worthy. Yes, you need steady hands. But the results rival any salon visit.
Make a Bold Statement With Single-Dot Minimalism
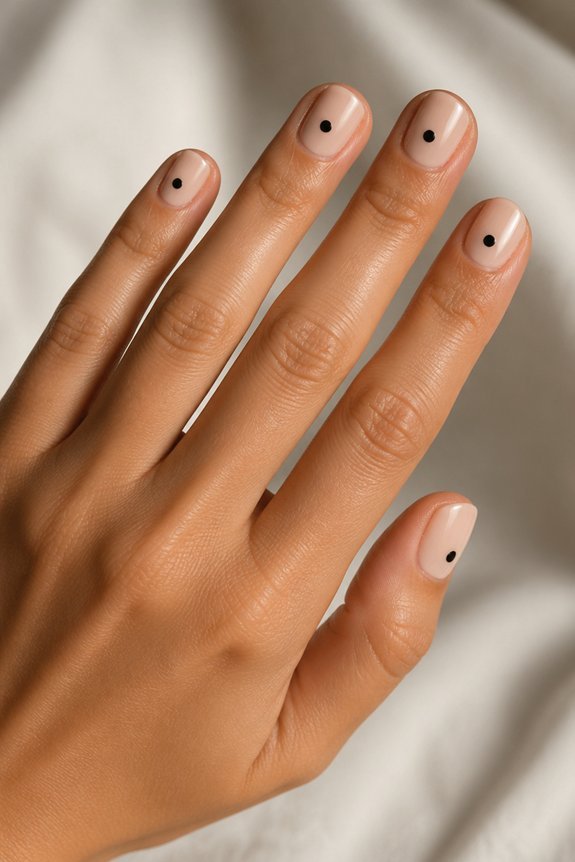
Want to make a statement without trying too hard? Single-dot minimalism has you covered. One tiny dot. That’s it. But placement is everything.
Put it off-center. Drop it near the cuticle. Watch how that single point draws the eye without shouting for attention. It’s restraint, but the confident kind.
Gelish polishes work beautifully here—the pigmentation stays crisp and catches light just right. Try a metallic gold on bare nails for quiet luxury. Or go graphic with black on white. Nail tech Sarah Chen puts it perfectly: “One perfect element outshines clutter.”
Move that dot around. Play with scale. Switch up your base colors. The framework stays simple, but your options don’t.
Frequently Asked Questions
How Long Do Polka Dot Nail Designs Typically Last Before Chipping?
Polka dot nail designs typically last two to three weeks before chipping occurs. The longevity depends on the polish quality, application technique, and daily activities. Professional gel manicures extend wear time considerably, often lasting three to four weeks with minimal chipping.
What Nail Polish Brands Work Best for Creating Precise Polka Dot Patterns?
Brands like Essie, OPI, and Sally Hansen offer excellent precision for polka dot patterns due to their consistent viscosity and fine brush control. Gel polishes from Gelish and CND provide superior durability and sharper dots compared to traditional formulas.
Can Polka Dot Designs Be Applied to Gel or Acrylic Nails?
Yes, polka dot designs can be applied to both gel and acrylic nails. Gel polish offers precision with dotting tools, while acrylics allow freehand painting or stamping techniques. Both mediums provide durability and longevity for polka dot patterns.
How Do You Remove Polka Dot Nail Art Without Damaging Natural Nails?
One should soak nails in acetone or use a nail dehydrator to soften polish gently. A person can then carefully push away softened polish with a wooden stick, avoiding scraping. This method protects natural nails from damage during removal.
What Tools and Brushes Are Essential for Painting Perfect Polka Dots?
One requires dotting tools in various sizes, fine-tipped brushes, and quality nail polish for precise application. Alternatively, toothpicks or bobby pins work effectively. A steady hand, proper lighting, and practice guarantee flawless, evenly-spaced polka dots on nail surfaces.
Conclusion
Polka dot nail art evolves beyond vintage aesthetics through layering techniques and unconventional color combinations. Mixing metallic finishes with gradient backgrounds creates dimensional manicures that feel both modern and wearable. Whether you prefer bold minimalism or intricate pattern work, these eight designs prove polka dots remain versatile for any occasion. Nail artists continue perfecting these techniques, transforming a classic motif into contemporary self-expression that refuses to fade from trend cycles.