
Glitter catches the kitchen light as you reach for your coffee. The holidays are coming. Your hands deserve something festive.
Bold designs work for some people. Others want quiet elegance.
These twelve options cover both ends. Candy cane swirls sit next to jewel tone gradients. Emerald green pairs with delicate snowflakes. Rose gold meets holly leaves.
Instagram will notice. Your friends will ask where you got them done. Some looks take ten minutes. Others need patience.
The season moves fast. So does inspiration. Pick one design this week. Try another next weekend. Your nails can tell different stories before December ends.
Simple Red Tips With White Polka Dots
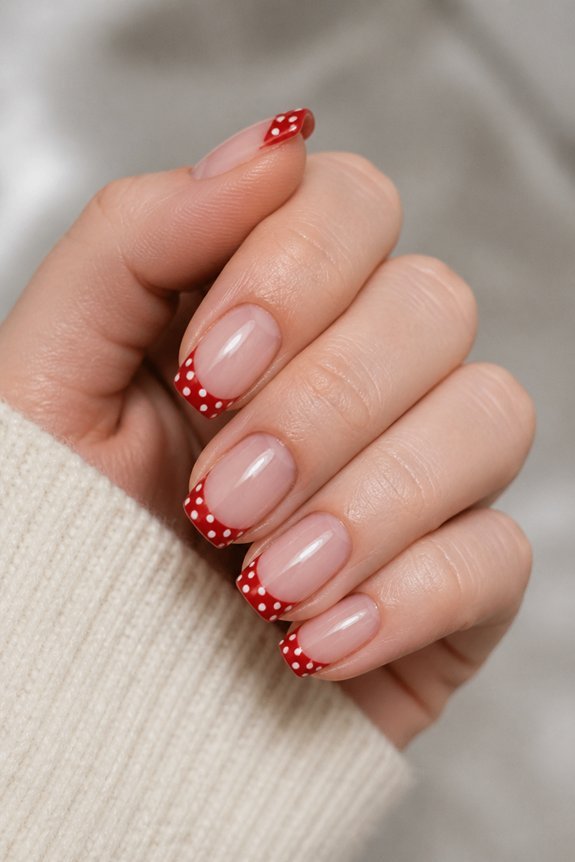
Want a holiday look that never feels tired? Red and white polka dots deliver every time.
Grab OPI “Big Apple Red” and paint two solid coats. Let it dry completely—patience here pays off. Then pick up a dotting tool (or bobby pin in a pinch) and stamp on white dots of different sizes. Cluster some tight together. Leave breathing room around others. Nail pro Michelle Lee swears by this asymmetry—it keeps eyes moving across your nails.
Seal everything with glossy top coat. You’re set for cookie swaps, office parties, or just Tuesday errands. The best part? This pairing looks expensive even when you DIY it at midnight.
Candy Cane Swirls
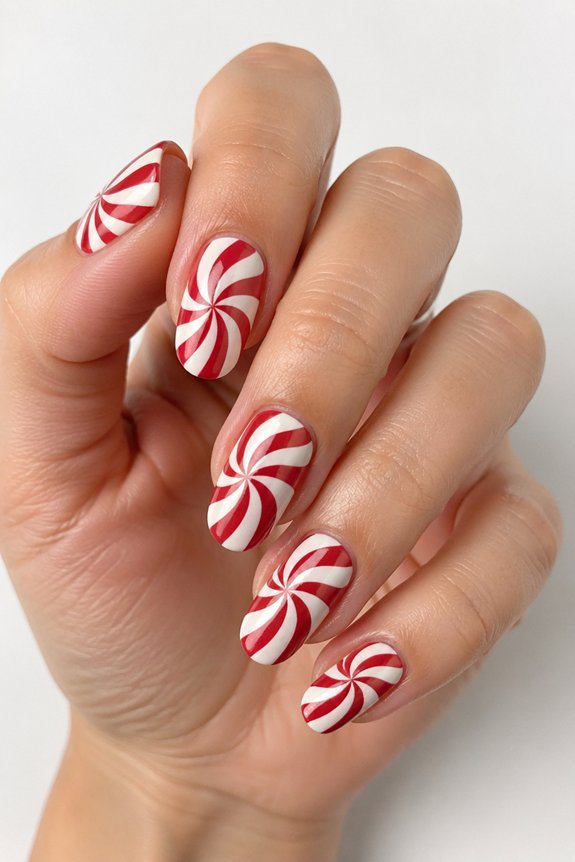
Ready to bring some holiday magic to your nails? Candy cane swirls are easier than they look. You just need patience and the right technique.
Start with a solid white base. Two thin coats work better than one thick one. Grab a striper brush or even a toothpick. Paint diagonal red lines across your nail. Now here’s the fun part—swirl those lines into soft curves while the polish is still wet. Work quickly. Small circular motions give you that authentic candy twist.
Practice on a fake nail first. Everyone messes up the first try. Medium-length nails show off this design best. Too short and you lose the spiral effect. Seal everything with a fast-dry top coat. Glossy finish makes the red pop even more.
Emerald Green With Snowflake Accents
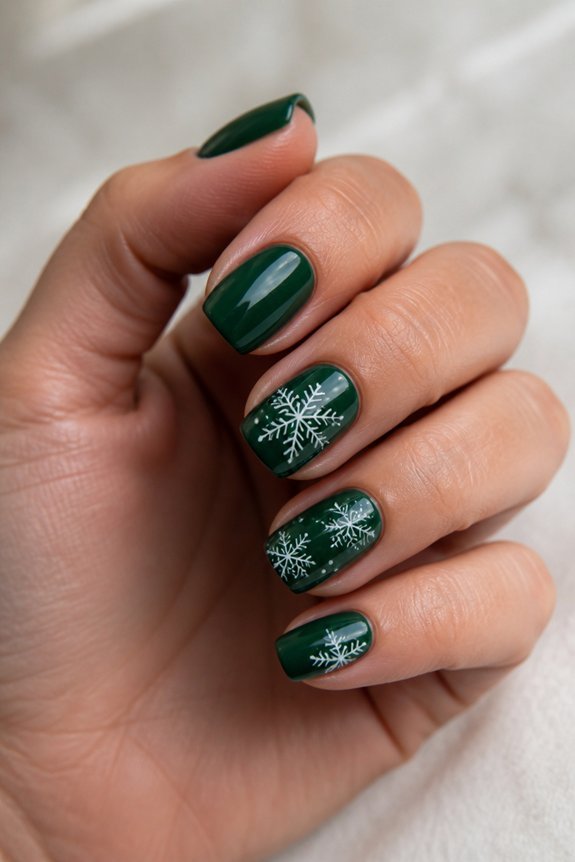
Ready to elevate your winter manicure? Emerald green nails with snowflake details strike the perfect balance between luxe and festive.
Start with two coats of a rich emerald polish. Essie’s “Bahama Mama” delivers that deep, jewel-toned coverage you’re after. Let each layer dry completely before moving on.
Now for the fun part. Grab white gel polish or a fine detail brush. Paint delicate snowflakes across your nails. Mix up the sizes. Layer some patterns for depth. Keep others minimal and centered. A nail artist once told me this combo works because “emerald screams luxury, but snowflakes keep it seasonal without looking childish.”
Seal your design with a glossy top coat. This protects your work and adds that salon-worthy shine.
Wear these to holiday parties or just because it’s Tuesday in December. The deep green against crisp white flatters nearly every skin tone. You’ll catch yourself staring at your hands all month.
Nude Base With Gold Christmas Trees
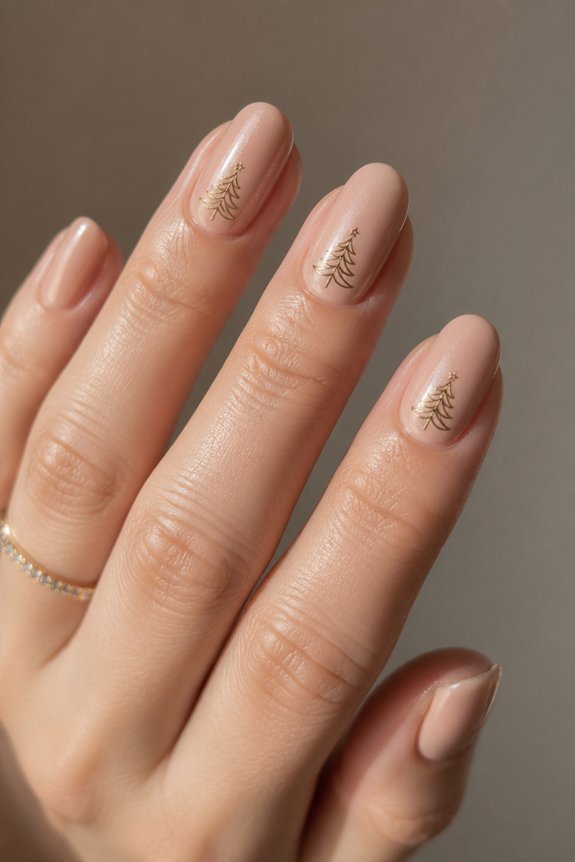
Looking for something festive but not flashy? Nude and gold Christmas trees might be your perfect match. You get elegance without screaming “holiday party.”
Start with your base. Pick a creamy beige or soft pink polish that feels close to your skin tone. Let it dry completely. Next, grab a thin gold brush or nail art pen. Paint simple tree silhouettes on one or two accent nails. The warm metal against neutral skin creates that quiet luxury vibe.
Try mixing finishes for extra polish. Keep your nude matte. Make those gold trees glossy. The contrast feels intentional, not busy. Want subtle sparkle? Dot tiny rhinestones at your tree tips. OPI’s “Worth a Pretty Penny” covers beautifully in one coat. December nails don’t need red and green to feel seasonal. Sometimes restraint speaks louder.
Minimalist White and Silver Metallic Stripes
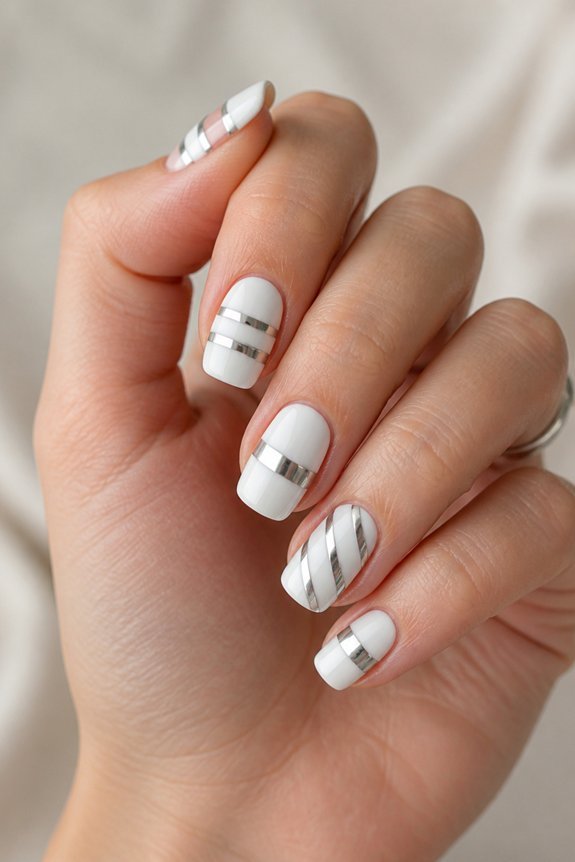
Ready to skip the red and green this year? You’re not alone. Many of us crave something quieter for December.
This look keeps things clean. Crisp white meets silver shine. That’s it. No fuss, no clutter.
Start with a solid white base. OPI’s “Alpine Snow” works beautifully. Two thin coats beat one thick one every time.
Now for the stripes. Grab a thin striping brush or a metallic gel pen. Draw parallel silver lines across each nail. Keep the spacing even. Same width, same distance. Your eye will thank you.
Mix it up from nail to nail. Try full-length stripes on some. Go diagonal on others. This adds interest without turning chaotic.
Seal everything with a glossy top coat. The shine amplifies the metallic effect. Plus your design lasts longer.
Beauty editor Sarah Chen loves this approach. She calls minimalist metallics “sophisticated yet office-appropriate.” You get elegance without screaming “holiday party.”
Short nails? Long nails? Doesn’t matter. This style adapts to whatever you’re working with.
Navy Blue and White Plaid
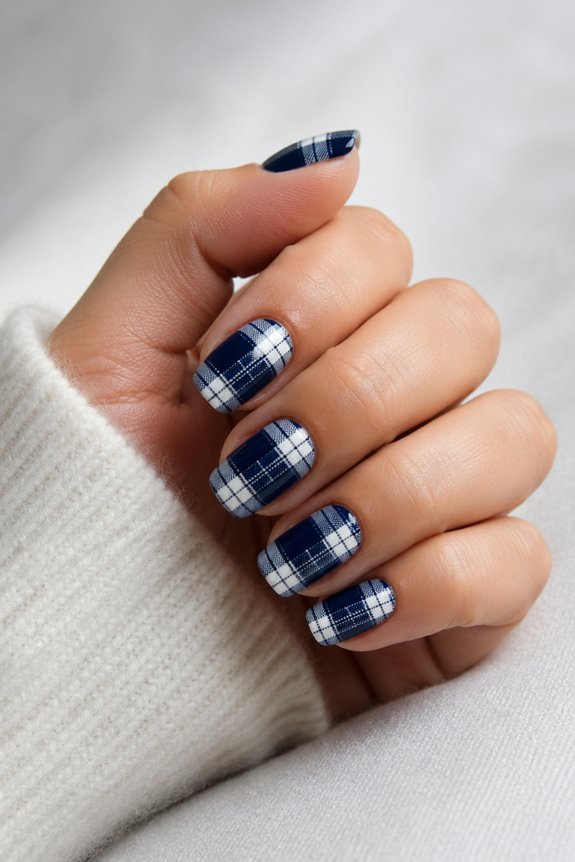
Want a pattern that feels polished but never fussy? Navy and white plaid hits that sweet spot. It works on any nail length. Short looks chic. Long looks striking.
Start with a creamy white base. Let it dry completely. Now grab a thin brush. Paint your navy lines horizontally first. Add vertical ones after. Layer them gently for that true plaid effect.
Try this trick: dab a tiny gold dot where lines cross. Instant warmth. OPI’s “Navy-gation” keeps lines crisp and opaque. Seal with a glossy top coat. You’re done.
This print hides tiny chips beautifully. It also pairs perfectly with chunky knits and holiday parties. As nail artist Jin Soon notes, plaid brings structure without trying too hard. Classic. Clean. Completely wearable.
Classic Red and Green With Gold Accents
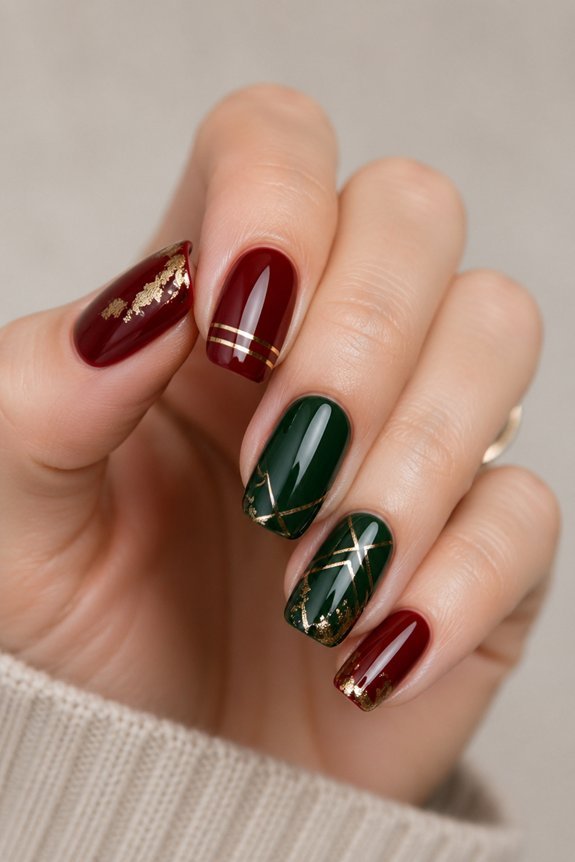
You know that moment when you see holiday nails that look expensive but you’re not sure how to recreate them? Red and green gets a bad rap for being predictable. But add a little gold? Suddenly you’re working with magic.
Start with deep crimson across your nail beds. No skimping on coverage here. Grab a thin angled brush and swipe forest green across just the tips. Want that extra something? Press gold foil along the edges. Watch how it catches light when you move your hands.
Try alternating colors if French tips aren’t your thing. One nail red, the next green, all with tiny gold geometric shapes scattered across. A nail tech I know swears by gel formulas for this look. They last through holiday parties and keep colors punchy. Thin coats are your friend here. Thick ones shrink and bubble.
Finish with a glossy topcoat. The shine adds depth you can’t get with matte. Short nails, long nails, almond or oval—this combo flatters them all.
Deep Burgundy With Glitter Ombre
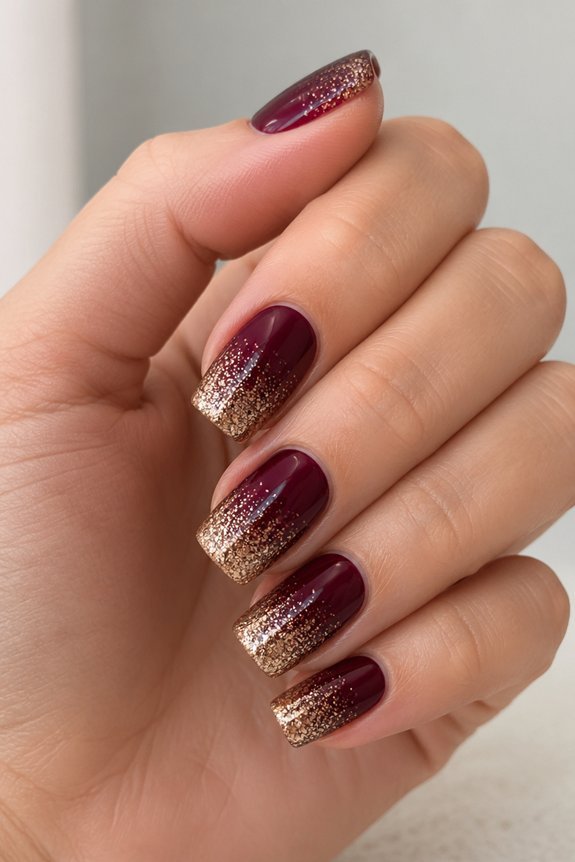
Ready to turn up the drama this holiday season? Deep burgundy with glitter ombre gives you that perfect mix of classy and festive.
Start with two coats of rich burgundy polish. OPI’s “An Affair in Red Square” works beautifully here. Then grab a makeup sponge. Dab glitter polish lightly at the tips and build slowly toward the middle. Keep the base dark and moody. Let the tips catch all the light.
A nail technician shared this trick with me: thin layers of glitter add depth without killing that gorgeous wine tone underneath. Too much sparkle too soon, and you lose the ombre effect entirely.
Finish with a solid top coat. Your nails will catch December’s gray light and photograph like absolute magic. Wear them to your office party. Wear them to pick up groceries. They work everywhere.
Matte Black With Neon Christmas Icons
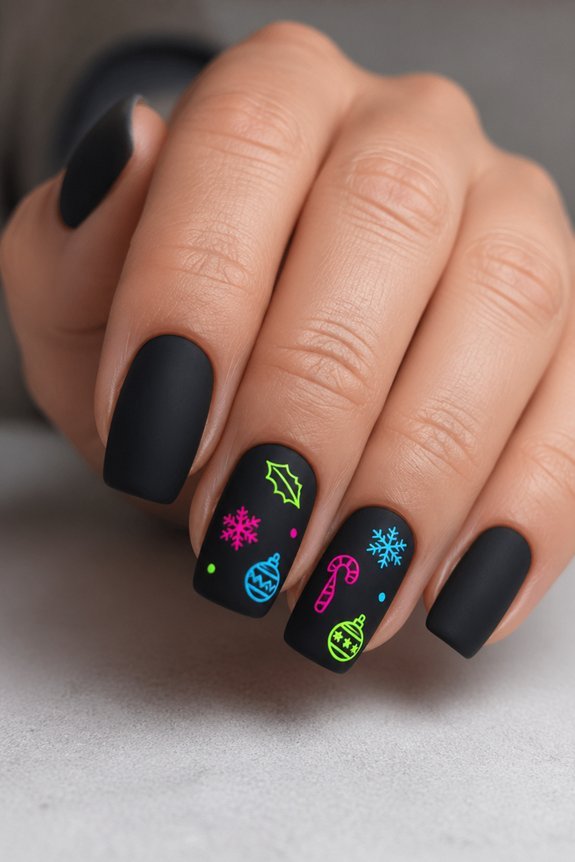
Ready to turn up the contrast? This look is all about that sweet spot between moody and electric.
Start with two coats of matte black. Let it dry completely. No shortcuts here. Then grab your neons. Think neon green trees. Hot pink ornaments. Electric blue snowflakes. Use thin brushes or nail art pens. Keep it simple. One or two icons per nail does the trick.
James Chen has a solid point. Matte finishes actually calm down neon chaos. You’re building balance without trying too hard. Layer your icons across different nails. Skip the crowded fingertip look. Want extra pop? Add glossy topcoat to just one accent per nail. That dimensional contrast hits different.
This design works everywhere. Holiday parties. Grocery runs. Your Tuesday morning coffee run. Edgy meets festive. You get both.
Jewel Tone Gradient With Diamond Embellishments
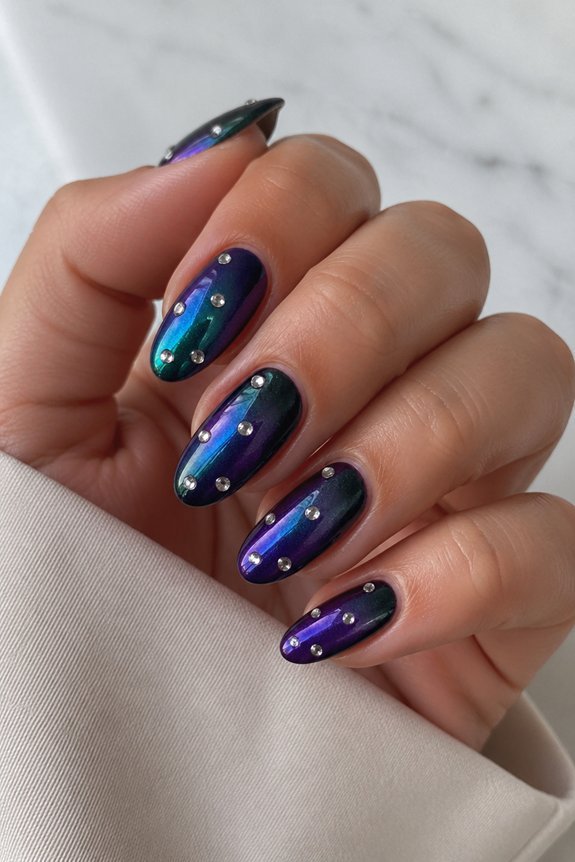
Want something polished without the neon punch? Jewel tone gradients deliver exactly that.
Deep emeralds, sapphires, and amethysts blend together like liquid gemstones. Grab a makeup sponge and dab the colors side by side. Work quickly while the polish stays wet. You’ll get that smooth, seamless shift from one rich shade to another. No harsh lines, no streaks.
Now for the sparkle. Diamond-shaped rhinestones catch light differently than rounds. Try one centered near the cuticle. Or line three small square crystals across the upper third of your nail. Celebrity artist Michelle Humphrey keeps hers minimal for that “expensive but effortless” vibe.
Pick your base wisely. Essie’s “Bahama Mama” gives you that deep plum. Sally Hansen’s “Mystic Emerald” leans properly festive. Use precision tweezers to place each stone. Press into fresh top coat or grab proper nail glue for staying power through every holiday party.
Rose Gold Sparkle With Holly Leaves
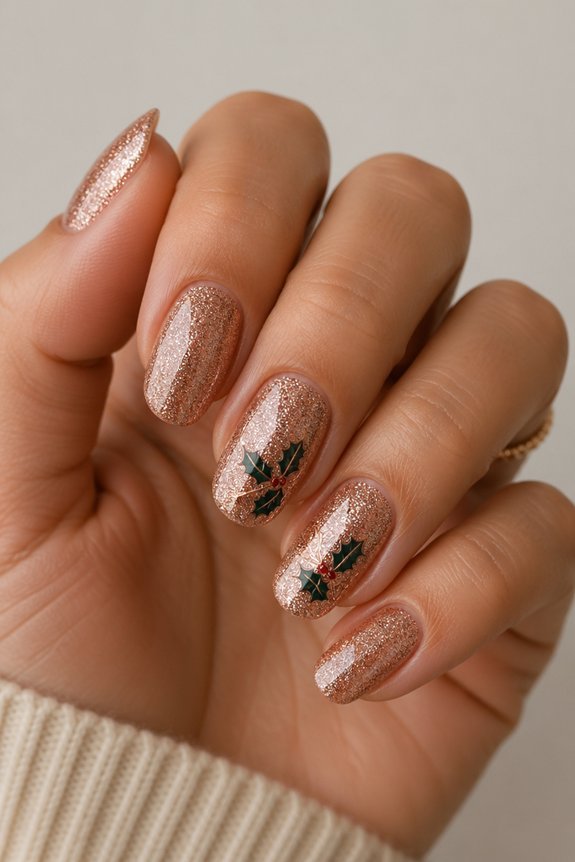
Ready to add some sparkle to your holiday look?
Rose gold glitter feels instantly festive. It warms up your skin tone, too. Pair it with holly leaves, and you’ve got nails that work for office parties and family dinners alike.
Start with a soft pink or nude base. Brush on rose gold polish in thin layers. Let each one dry fully. The shimmer builds beautifully this way. Next, grab a fine detail brush. Paint small holly leaves in deep green. Dot on tiny red berries near the leaves. Easy, right?
Struggling with freehand designs? No worries. Use holly leaf stickers instead. Press them on, then sweep loose rose gold glitter into clear topcoat. You’ll get gorgeous texture without the stress. Celebrity manicurist James Chen loves this hack. His take? It captures formal style and holiday fun at once. Finish with glossy topcoat. Your sparkle stays protected for weeks.
Cream and Copper Geometric Holiday Design
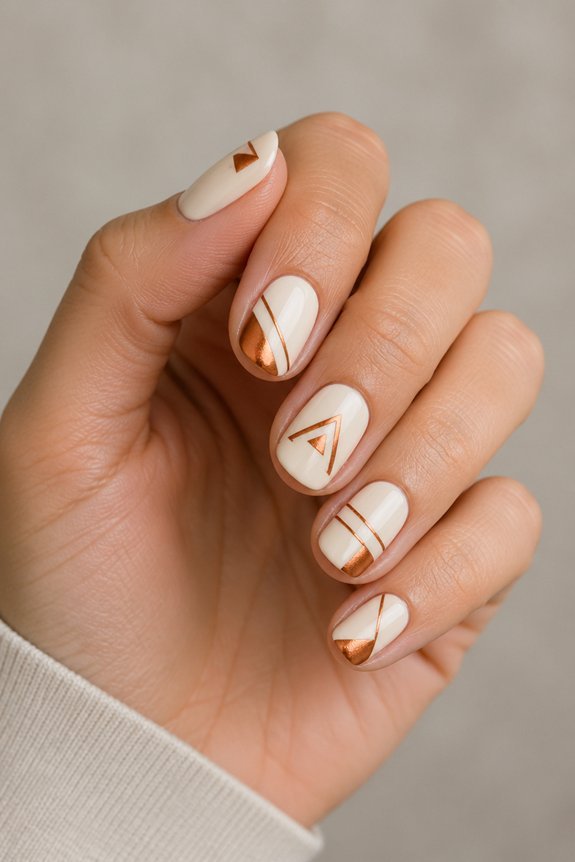
Want a December manicure that feels fresh, not fussy? Geometric patterns strike the perfect balance. Clean lines instantly modernize your look. Copper warms everything up for the season.
Grab a quality cream polish. OPI’s “Alpine Snow” gives you that smooth, opaque base in two coats. Now sketch your shapes. Triangles work great. Diamonds too. Or go abstract if you’re feeling playful. Use a thin nail art brush and Sally Hansen’s Copper Shimmer—it delivers real metallic shine without the disco ball effect.
Nail artist Maria Chen calls geometric designs “architectural precision.” Here’s a pro trick she loves. Paint some sections glossy. Leave others matte. The contrast adds depth without extra effort. Glossy topcoat over your copper lines. Skip it on the cream base. Instant sophistication.
This look transitions beautifully. Office meeting at three. Holiday party at seven. You’re covered.
Frequently Asked Questions
How Long Do Festive Nail Designs Typically Last Before Chipping or Fading?
Festive nail designs typically last between seven to ten days before noticeable chipping occurs. Regular gel manicures extend this duration to two to three weeks. Longevity depends on maintenance, application quality, and daily activities.
What Base Coat and Top Coat Products Work Best for Holiday Nail Art?
Quality base coats like OPI Base Coat and Gel Primer create excellent adhesion for festive designs. Seche Vite and Sally Hansen Insta-Dri top coats provide superior shine and chip resistance, ensuring holiday nail art maintains its vibrant appearance longer.
Can I Create These Designs at Home Without Professional Nail Art Tools?
Yes, one can create festive nail designs at home using basic supplies. A person needs only nail polish, a thin brush or dotting tool, and steady hands. Many designs rely on simple techniques like dotting, striping, and stamping rather than specialized equipment.
How Do I Remove Glitter and Embellished Nail Designs Without Damaging My Nails?
One should soak nails in acetone-based remover for ten to fifteen minutes, allowing the polish to soften. Gently rolling glitter and embellishments away with a cuticle pusher prevents nail damage. Moisturizing afterward restores hydration to the nail bed.
Which Nail Shapes Work Best for Displaying Intricate December Holiday Designs?
Almond and coffin shapes provide ideal canvas space for intricate holiday designs. Stiletto nails offer dramatic presentation, while square shapes deliver balanced detail visibility. Oval nails work universally well, accommodating complex patterns without overwhelming the nail bed.
Conclusion
These nine nail designs offer something for every holiday aesthetic. Whether choosing bold reds, elegant metallics, or jewel tones, each style combines technical precision with festive impact. Nail artists recommend quality gel formulas and thin brushes for detailed work. From simple polka dots to geometric patterns, these manicures deliver salon-quality results at home. Strategic embellishments and color combinations guarantee your nails become conversation starters all season.