A cut crease is one of the most striking eye makeup techniques available today. It works by dividing your eyelid into two distinct color zones, with a darker shade applied along your natural crease line and a lighter color positioned above it. This creates sharp, clean definition that instantly makes eyes look bigger and more sculpted.
Executing this look properly demands more than just steady hands. You’ll need precision brushes, high-quality eyeshadow products, and knowledge of proper blending techniques to avoid harsh lines. Many beginners struggle because they skip the blending step or use the wrong brush sizes for their eye shape.
The key difference between a polished cut crease and an unflattering one often comes down to placement and color selection. Finding your natural crease line is crucial, and choosing complementary shades that work with your skin tone makes all the difference.
Practice and experimentation will help you develop the muscle memory needed for consistent results. With dedication and the right tools, anyone can master this dramatic eye technique.
Start with neutral shades if you’re new to cut creases, then gradually experiment with bolder color combinations as your confidence grows.
What Exactly Is a Cut Crease?
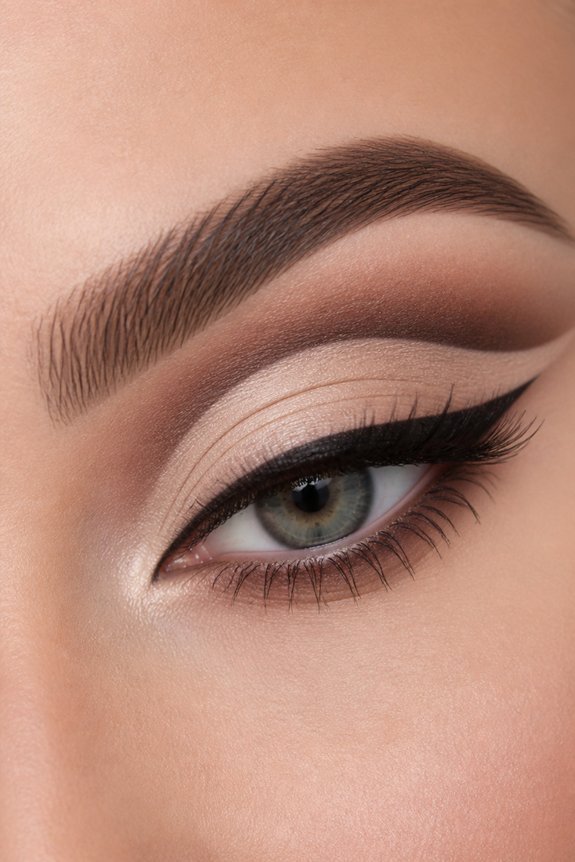
A cut crease is a sharp line that splits your eyelid into two color zones. You place a darker shade right along your natural crease, then add a lighter color above it. The contrast makes your eyes pop and look bigger.
Getting that crisp line takes practice and the right tools. An angled brush works best for carving out clean edges with your eyeshadow. The key is blending where the two colors meet so it looks polished, not harsh. This technique flatters most eye shapes and skin tones when you nail the application.
Brushes, Products, and Techniques You’ll Need
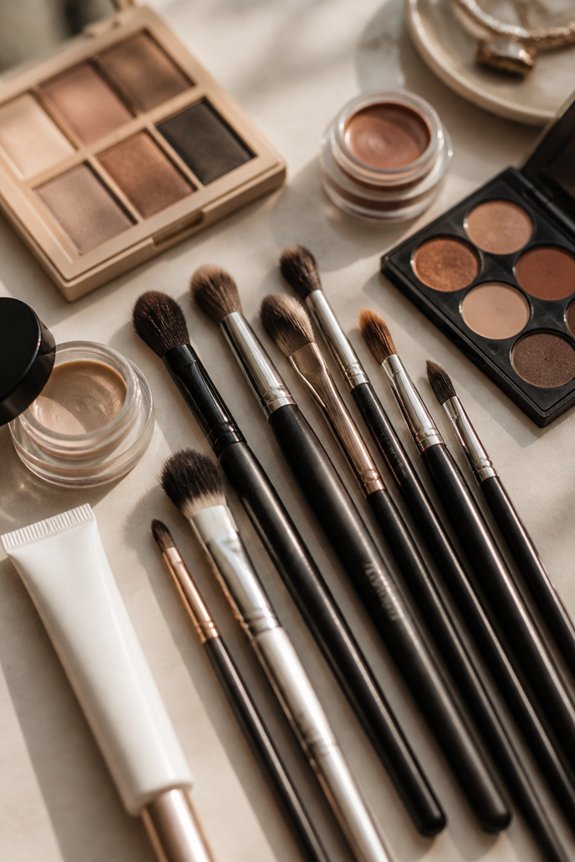
Start with a flat, angled brush. This is your precision tool for creating that clean line between your lid and brow bone. Pair it with a fluffy blending brush and use windshield wiper motions to soften edges naturally.
Your base matters more than you’d think. Cream shadows like MAC Paint Pot keep everything locked in place and stop pigment from sliding around. Layer a highly pigmented powder shadow on top, going for contrast like deep charcoal against champagne for maximum impact.
The trick is keeping matte shadows on your lower lid while using glossy finishes above. An eyeliner pencil sharpens your crease line when you need extra definition. Finish with translucent powder to seal everything and keep creasing at bay all day long.
How to Create a Perfect Cut Crease: Step-by-Step
- Start with a silicone-based primer like Urban Decay Primer Potion on your lids. It acts as glue for your eyeshadow and keeps everything in place all day long. This simple step stops creasing and makes your makeup last way longer.
- Sweep a nude or skin-toned shadow across your whole lid using a flat, dense brush. You’re basically creating a smooth base for everything else. Even coverage means no patchy spots later on.
- Now for the magic part. Take a deeper shade and carefully apply it along your crease line with a sharp angled brush like MAC 217. Work it upward gently so the color fades rather than creating a hard line. This blending is what separates a cut crease from a regular eyeshadow look.
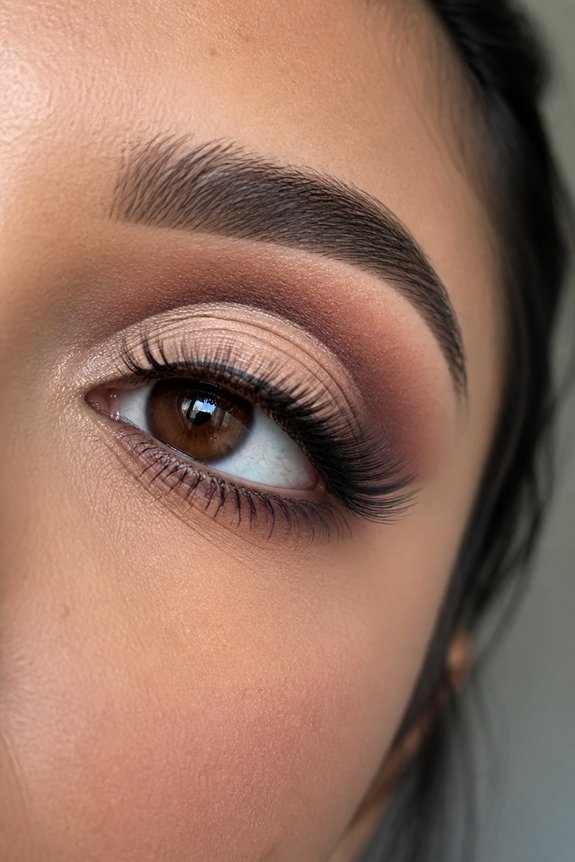
- Top it off with a bright shimmer or matte highlight right on the lid. The contrast between your crease shade and this highlight is what makes the cut crease really stand out. You’ll end up with a sculpted eye that looks professionally done.
Where Cut Creases Go Wrong (And How to Fix It)
Harsh lines are the enemy of a polished look. Grab a fluffy blending brush and use circular motions to soften the edges between your colors. This simple step transforms sharp transitions into seamless blends.
Uneven placement throws off your whole eye. The fix is simple: lightly mark your crease line with concealer on both eyes before committing to color. This acts as your personal guide and keeps things balanced.
Patchy color means your primer needs attention. A quality primer creates the smooth base your shadows need to stick around and look flawless. Don’t skip this step.
Fallout during application usually comes from overly wet brushes. Let cream shadows set for a moment before layering powder on top. This prevents the messy flakes and keeps everything in place.
Color bleeding happens when your formulas don’t play well together. Some textures need a specific layering order to work properly. Test your products together first to avoid surprises on application day.
The secret to consistent, polished results? Practice and proper prep. These fixes might seem small, but they make a real difference in how your cut crease looks and lasts throughout the day.
Also Read: What Is Smokey Eye Makeup
Cut Crease for Different Eye Shapes: Customizing Your Technique
Not all eyes are created equal, and cut creases shouldn’t be either. Different eye shapes require tailored approaches for ideal results.
For hooded eyes**, place the crease higher on the lid so it shows when your eyes open. Start with a matte blending shade like Urban Decay Primer Potion as your base. Then carve the cut crease** above your natural fold to create visible dimension.
Monolid eyes look best with a more dramatic, extended cut crease. Follow your eye’s natural contour and apply the shadow at a steeper angle for sharper definition.
Wide-set eyes need the crease positioned closer to the inner corner. This pulls your eyes inward for a more harmonious look. Close-set eyes are the opposite: move the crease toward the outer third instead.
Round eyes benefit from a slightly winged crease application. This lifts the eye and gives you a more open appearance. The key is adapting placement to your specific eye shape so every application looks flattering and personalized.
Also Read: What Is Eye Makeup Primer
Frequently Asked Questions
How Long Does a Cut Crease Typically Last Throughout the Day?
A cut crease typically lasts 6-8 hours throughout the day with proper application and quality products. Longevity depends on eye makeup primer usage, eyelid oiliness, and the specific cosmetics employed. Waterproof formulas extend wear time considerably.
Can Beginners Achieve a Cut Crease, or Does It Require Professional Experience?
Beginners can achieve cut creases with practice and proper tools, though it requires patience and steady hands. Professional experience helps, but tutorials and practice make the technique accessible to dedicated makeup enthusiasts regardless of skill level.
Which Eyeshadow Brands Are Best Known for Cut Crease Makeup Products?
Like ancient Egyptians perfecting their craft with modern technology, brands such as MAC, Urban Decay, and Anastasia Beverly Hills dominate cut crease products. Their highly pigmented palettes and precision applicators remain industry standards for achieving sharp, defined crease lines.
Is a Cut Crease Appropriate for Everyday Wear or Special Occasions Only?
Cut creases work for both everyday and special occasions. The appropriateness depends on personal preference, skill level, and desired intensity. Subtle versions suit daily wear, while dramatic interpretations better complement formal events and photography.
How Do You Remove Cut Crease Makeup Without Damaging Delicate Eye Area Skin?
To remove cut crease makeup without crying over spilled milk, one should use a gentle makeup remover or micellar water on a soft cotton pad. Gently swipe the delicate eye area without tugging or rubbing the skin excessively.
Conclusion
The cut crease remains a transformative technique in modern makeup artistry. Mastering this telegraph-era precision method elevates any eye look. Practice with quality brushes and pigmented shadows builds confidence. Different eye shapes demand customized approaches for ideal results. Success requires patience, proper blending, and willingness to experiment. Once perfected, cut creases deliver striking dimension that enhances natural features beautifully.