Wind bites your cheeks as you step outside. Your hair tangles instantly, snapping in the dry air. It’s that time of year again.
Braids solve this problem quietly. They keep strands tucked away from the cold. No more static. No more breakage from scarves and coats. Dutch braids work beautifully under beanies. Crown braids stand alone at holiday gatherings. Each style protects while it decorates.
Does your Monday morning rush leave zero minutes for styling? A simple side braid takes ninety seconds.
Are you craving something fancier for a winter wedding? A fishtail woven with ribbon turns heads without turning fragile ends toward the frost. The best braid matches your real life, not just your Pinterest board.
Dutch Braid: The Go-To Braid for Winter
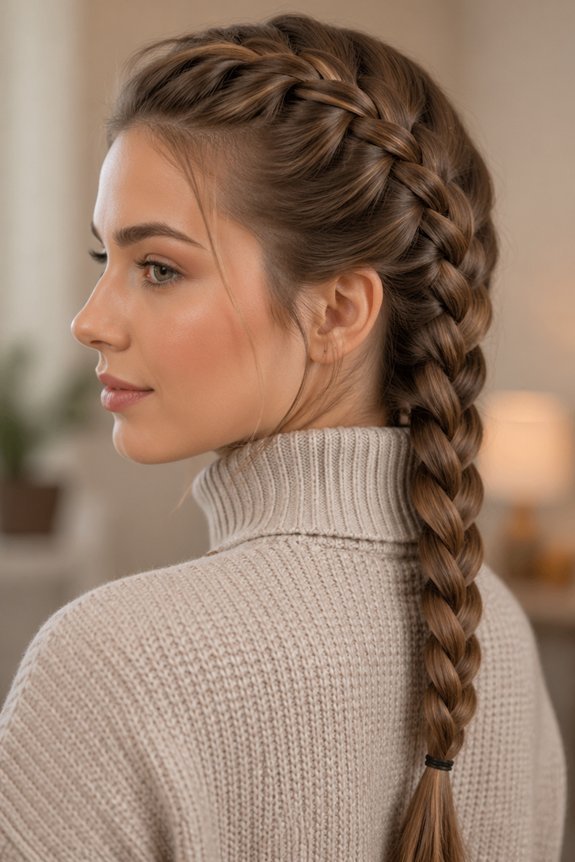
Tired of your hair falling flat under winter hats? The Dutch braid solves that.
It’s an inverted French braid that sits right on your scalp. This keeps your hair locked in place all day. Cold wind won’t touch it. Your style stays intentional, not messy.
You need grip first. Work with second-day hair. Try a volumizing product like Olaplex No. 6 Bond Smoother. It adds texture without the weight.
Leave a few face-framing pieces out. Braid tighter at the crown. This creates natural dimension. Colorist Sarah Chen loves how these braids show off highlights. They also tuck away color-treated ends from harsh winter air.
Finish with something fun. Clip on a statement barrette. Wrap a metallic tie at the end. You can go sleek for work. Pull a few strands loose for drinks later. One braid, two moods.
Half-Up Braid: Effortless Style Without Full Commitment
Tired of choosing between full braids and leaving everything down? You don’t have to.
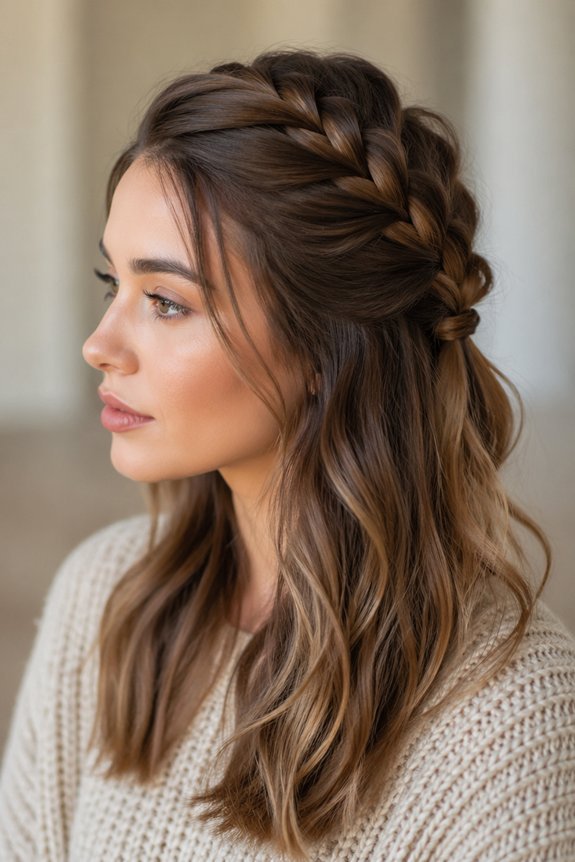
The half-up braid gives you the best of both worlds. Your face stays clear. Your waves stay free. It’s the winter style that actually makes sense.
Start with dry hair. Section from temple to temple. French braid the top. Dutch braid if you prefer that raised look. Secure with a small clear elastic.
Spray Bumble and bumble Thickening Full Form Mousse first. It gives your hair something to grip. No slipping. No sad, loose strands.
Leave the bottom completely down. Let it move. Let it catch the light.
One celebrity stylist swears by this trick: pull out two small pieces near your face. It softens everything. Makes it feel less “done.”
Your winter hat goes over the back without issue. No weird bumps. No flattened crown.
Wear it to coffee. Wear it to a party. It works for both.
And here’s the real win: your ends stay protected from cold, dry air. Your face stays warm. You look like you tried—without trying too hard.
Rope Braid: Quick Elegance in Minutes
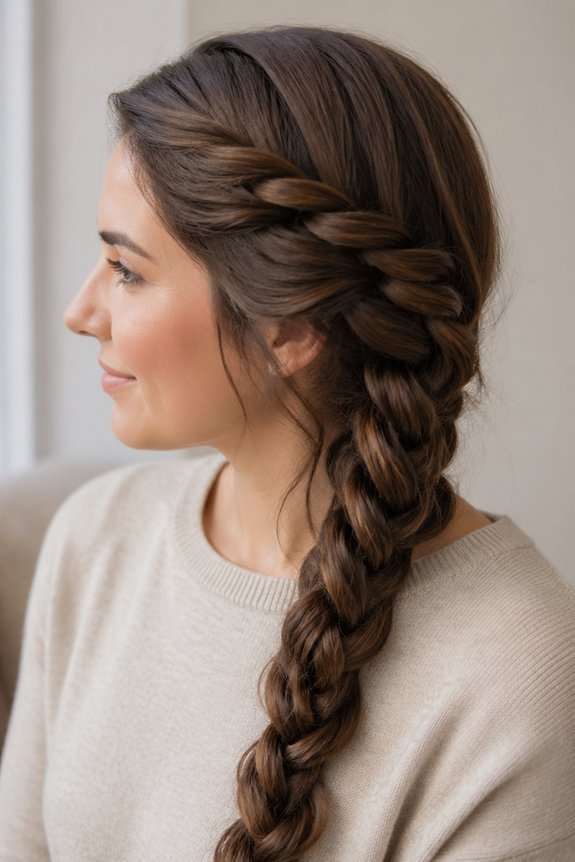
Tired of braids that take forever? The rope braid is your answer. You’re looking at two minutes, two strands, and zero stress.
Grab yesterday’s hair. Second-day texture is your friend here—it holds the twist without slipping. Part two equal sections up top. Now twist each strand away from your face. Wrap them around each other as you go. That’s it. Instant dimension.
Mist on texturizing spray first if your hair feels slippery. Want a softer look? Tug the edges gently once you’re done. James Boehmer swears these braids glow in winter light—perfect for those quick outdoor photos.
Tuck in a tiny elastic or a simple clip at the bottom. Leave a few layers loose around your face. You look polished. You didn’t even try.
Crown Braid: Protect Your Hairline in Style
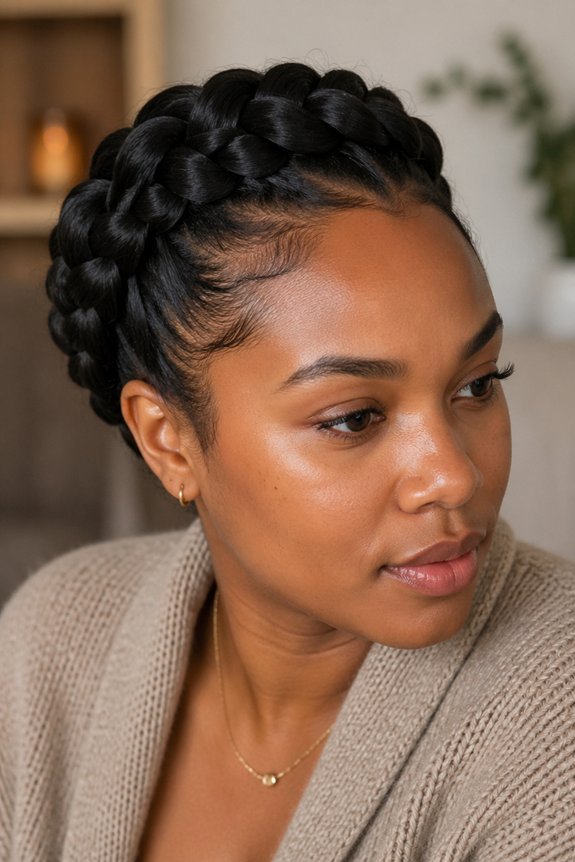
Feeling the winter wind sting your face? Your hairline feels it too. A crown braid wraps your hair in protection while keeping you polished.
You’ll start with dry hair and a light mist of texturizing spray. Bumble and bumble Thickening Full Form Mousse works beautifully here. Section your hair into two parts. Twist each one separately, then weave them together around your head. Begin near your ear and work your way across.
Celebrity stylist Sarah Gordon loves this look for cold months. “The braid spreads tension evenly,” she says. That means less breakage where your hair needs protection most. Finish with a lightweight hairspray. Your front pieces stay soft and move naturally. Wear it to work. Keep it for dinner. The style holds up beautifully either way.
French Braid: Classic Elegance, Modern Twist
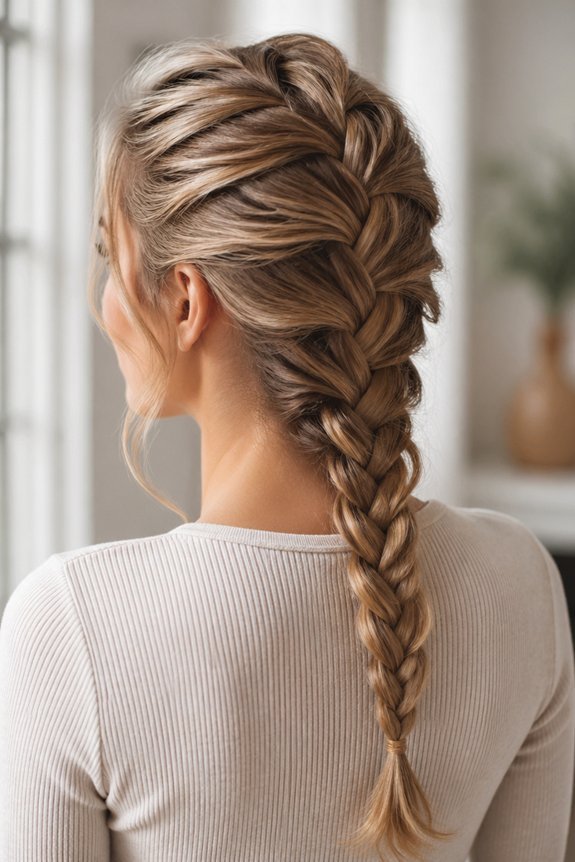
You want a style that works for everything. The French braid delivers.
Start at your crown. Grab three sections. Weave them together, adding more hair as you go. This builds volume right where you need it. Your hair stays protected from cold wind and dry air. No more static or breakage.
Try a loose, romantic version for date night. Go tighter for skiing or morning runs. Your texture doesn’t matter. Fine hair? Add a volumizing cream first. Jen Atkin swears by this trick for photos. Thread some metallic ribbon through for fun. This braid moves with your day. Coffee to cocktails. No changes needed.
Fishtail Braid: Textured Look for Cold Weather
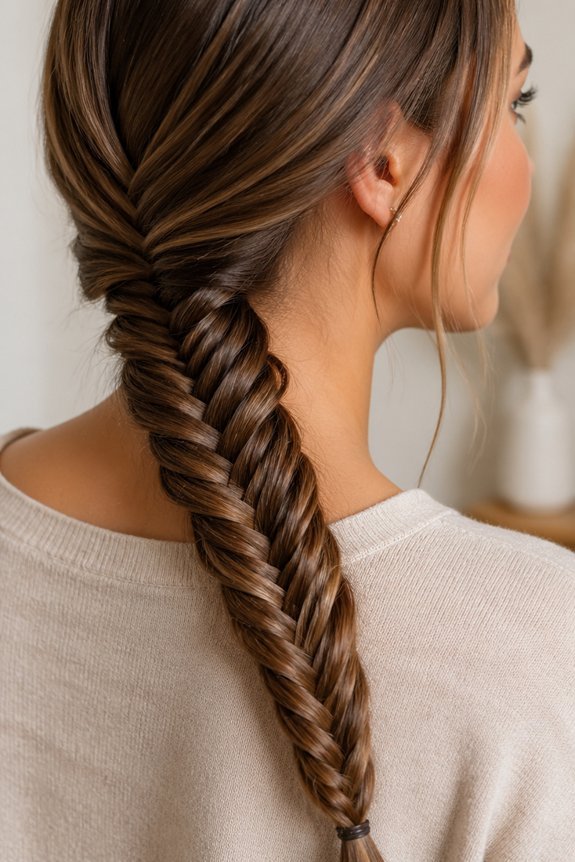
Tired of sleek hairstyles that feel too stiff for winter? A fishtail braid brings the texture your cold-weather look needs.
This braid catches light in all the right ways. Thin strands weave from side to side, creating that delicate, almost rope-like pattern. It frames your face without trying too hard.
Celebrity stylist James Boehmer swears by this trick for winter. “The texture hides second-day hair instantly,” he says. Oval and heart-shaped faces especially shine with this style.
Start with damp strands. Work in Bumble and bumble Thickening Full Form Mousse for grip. Split your hair in two. Cross thin outer pieces toward the center each time. Keep going until you reach the ends.
Side Braid: Asymmetrical Frame for Any Face Shape
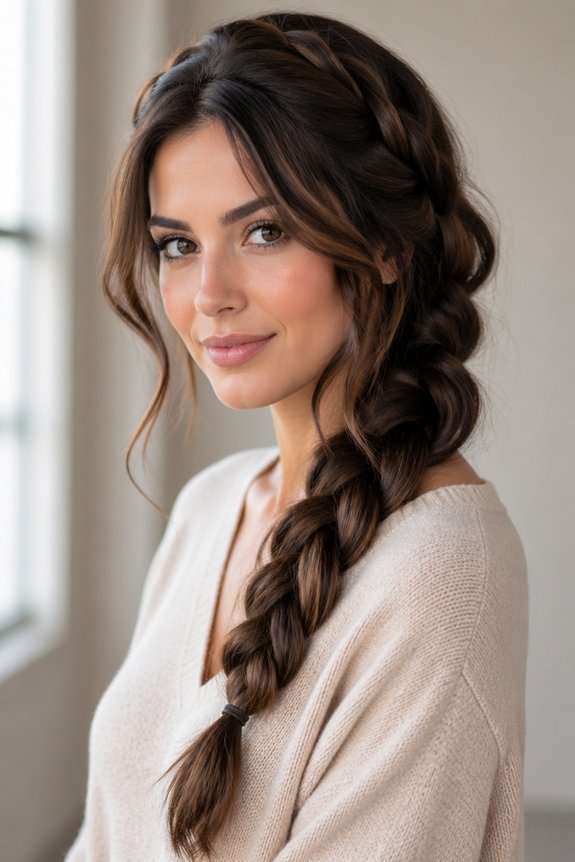
Side braids consistently deliver an effortless elegance that works across all face shapes and hair textures.
This asymmetrical style flatters round faces. It creates vertical lines that elongate your features. Oblong faces benefit from the softness a side braid introduces near your cheekbones.
Want dimension? Braid loosely using a three-strand technique. Leave face-framing pieces undone for a relaxed aesthetic.
Stylist Maria Chen gets it right: “Side braids work because they draw the eye horizontally, balancing facial proportions naturally.”
Apply volumizing mousse to damp roots before braiding. This prevents that flat, lifeless look.
Secure the braid with matching elastics and bobby pins. Spritz lightweight hairspray for extra hold.
Your side braid shifts seamlessly from casual daytime wear to polished evening looks. Layer with winter accessories like beanies and scarves when temperatures drop.
Milkmaid Braid: Vintage Vibes for Winter Events
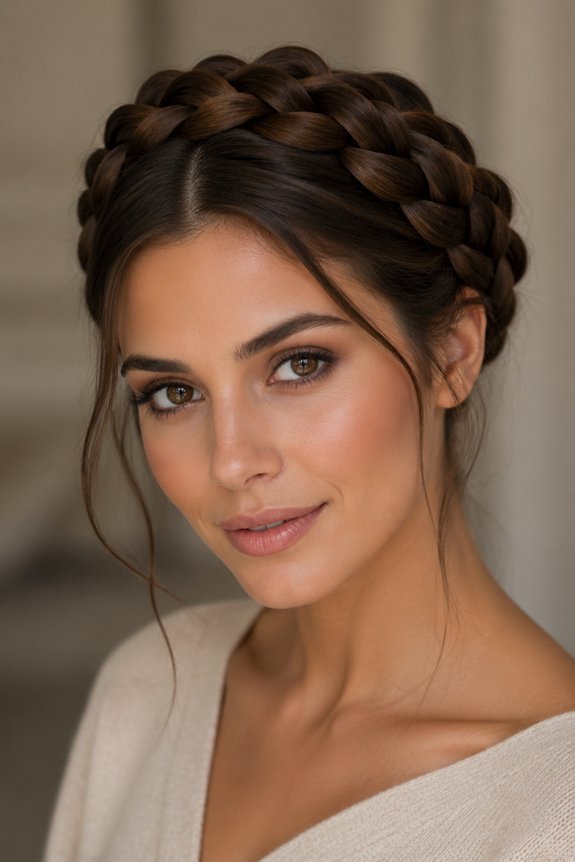
Ever wish you could bottle that cozy, nostalgic feeling? This braid does exactly that.
You’ll wrap two Dutch braids around your crown like a soft halo. It’s romantic. It’s dimensional. And it works everywhere—from holiday parties to winter weddings.
Start with damp hair. Mist on some texturizing spray for grip. Bumble and bumble Thickening Full Form Mousse gets the job done nicely. Section your hair down the middle. Braid from each temple toward the back. Then wrap each braid around the opposite side of your head. Secure with bobby pins.
Pull out a few face-framing pieces before you finish. That softness makes all the difference.
Some things just don’t fade. This style proves it.
Waterfall Braid: Flowing Drama With Warmth
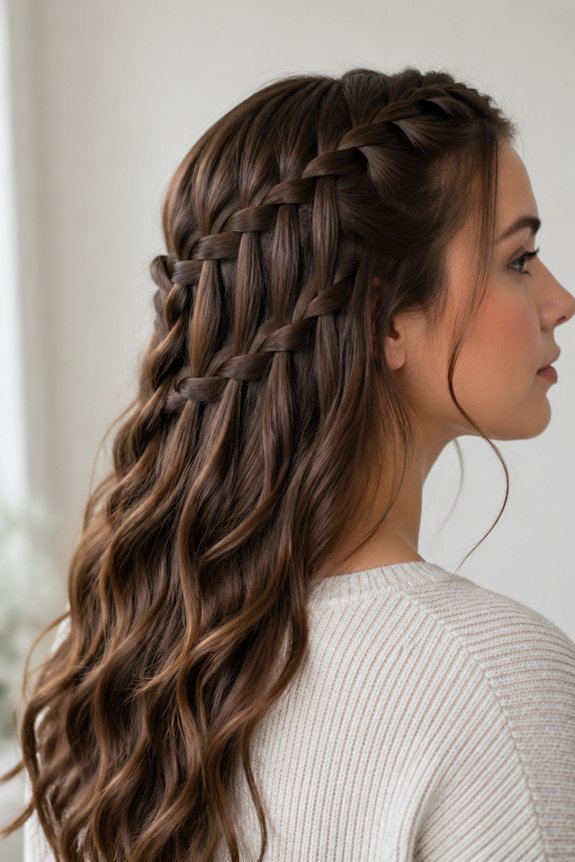
You might think waterfall braids are too complicated for everyday wear. They’re not. This style gives you that cascading, face-framing effect without hours in front of a mirror.
Start with texture. Spray some sea salt or dry shampoo through your hair. Build volume first. Then begin at your temple. Weave small sections while letting strands drop freely—picture water falling over stones. It’s easier than it looks. The result mixes detail with relaxed charm. Perfect for winter when you want polish without stiffness.
Warm earth tones and jewel accessories complement this braid beautifully. Try copper bobby pins or a small amber clip. The style shifts seamlessly from your morning coffee run to evening plans. Pull a few face-framing pieces loose for softness. Kim Kimble swears these braids glow in natural winter light, especially with dimensional color woven through. You’ll get drama and warmth in one simple move.
Boxer Braids: Edgy Double Style That Lasts All Day
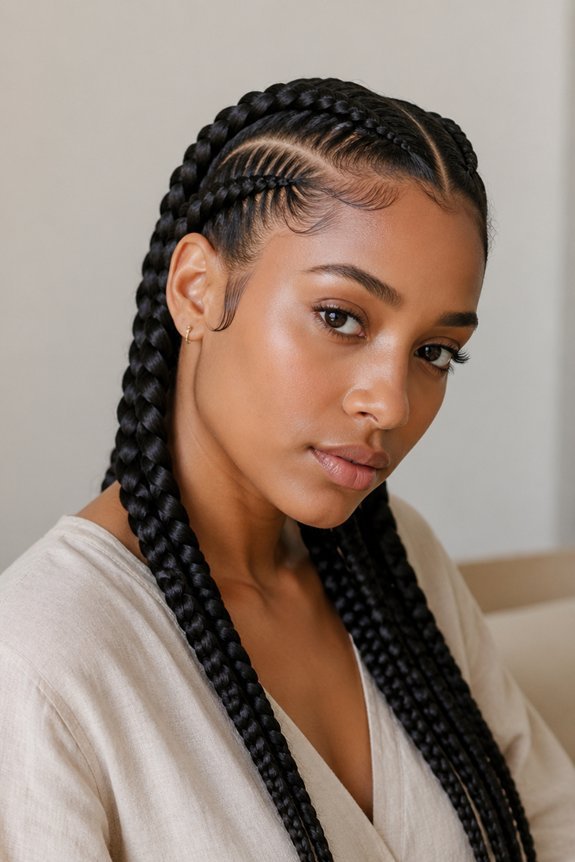
Tired of hairstyles that fall apart by noon? Boxer braids have your back.
You get two tight French braids. They frame your face perfectly. They stay put through everything—workouts, commutes, long days. Start by parting your hair dead center. Braid each side close to your scalp. Keep the tension even from top to bottom.
Here’s the secret to making them last. Spray a light texturizer first. Bumble and bumble Thickening Full Form Mousse works great. It gives your hair grip without that crunchy feel. Your braids look polished, not messy.
Want to level up? Weave a thin ribbon through one braid. Try gold thread for something subtle. Face-framing highlights pop beautifully against darker hair. You get that sporty edge plus real style points.
Pancake Braid: Add Volume When Winter Flattens Your Hair
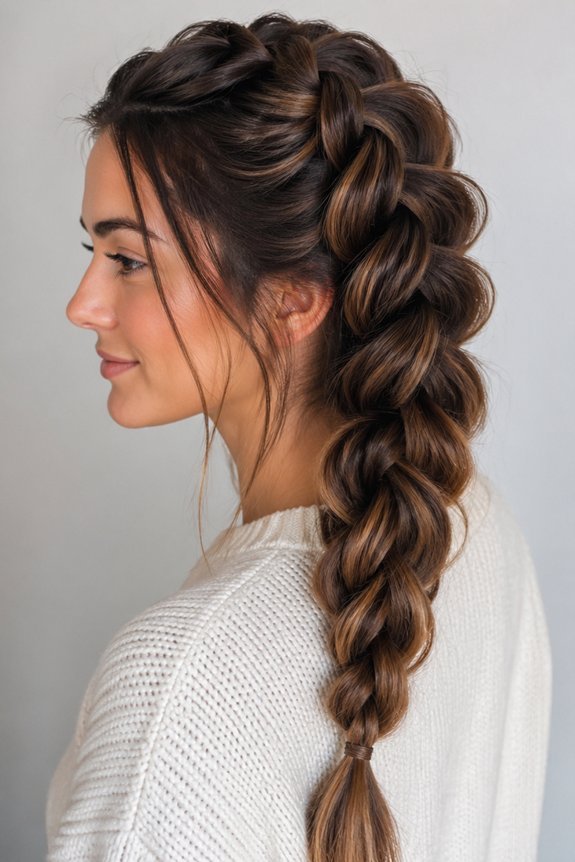
Does your hair go flat the second you step outside in winter? You’re not alone. Dry air and static zap volume fast.
The pancake braid saves the day. It’s simple. You braid normally, then fluff.
Start with a basic three-strand braid. Done? Good. Now gently pull each loop outward from the center. Work from bottom to top. This gives you control. No messy over-expansion.
You’ll see instant thickness. The braid looks fuller. More textured. Winter flattening? Cancelled.
Prep matters. Spray Bumble and bumble Thickening Full Form Mousse first. It adds grip. Your braid holds better. Dry shampoo works too, especially between sections for extra texture.
Fine hair? This trick was made for you. Stylists love it. Your limp strands become dimensional and eye-catching. The style lasts all day, even in the cold.
Lace Braid: Delicate Details for Holiday Parties
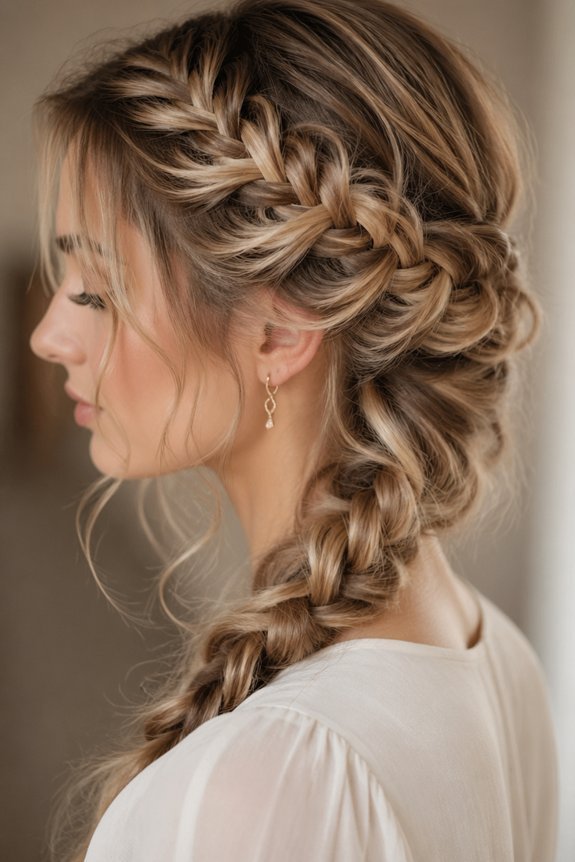
Need a holiday hairstyle that looks fancy without the stress? The lace braid delivers. It turns any basic braid into an eye-catching, delicate pattern. Thin sections weave through your base braid. Light catches those open spaces. Suddenly, you’re party-ready.
Start simple. Braid three strands normally. Then gently tug small sections outward from each side. Widen those gaps. The result looks intricate. But guess what? Most people can do this.
Hair stylist Marcus Chen has a pro tip for you. “Second-day hair works best,” he says. Your hair already has texture from yesterday’s products. Need more grip? Spritz on Bumble and bumble Thickening Full Form Mousse first. It adds hold and dimension.
This braid shines in holiday updos. Pair it with gold or silver accessories. Try deep emerald or ruby tones in your outfit. You’ll look polished all evening. The style stays secure through dancing, dinner, and champagne toasts.
Twisted Crown Braid: Dressed-Up Look Without Heat
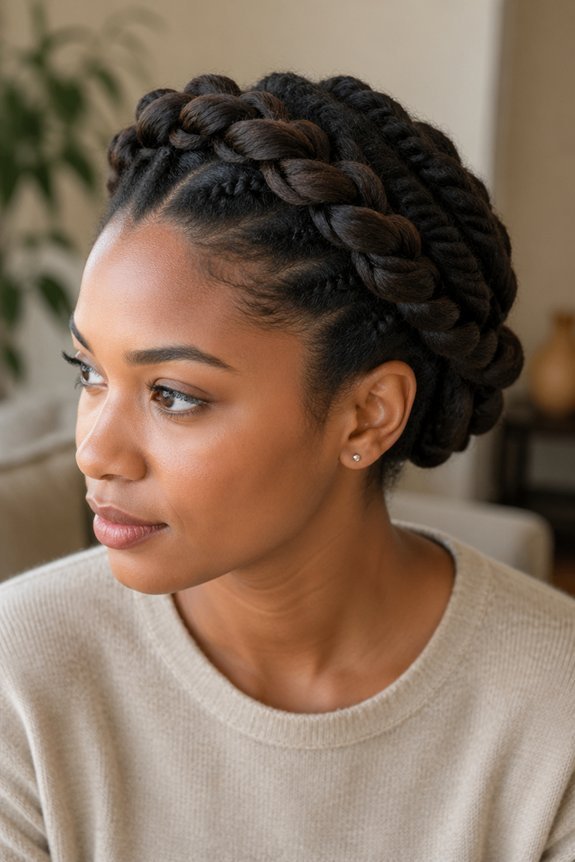
Want an elegant updo without frying your hair? A twisted crown braid gives you exactly that.
You frame your face beautifully while skipping the heat entirely. Two sections of hair weave around your head’s perimeter. You twist each one loosely, then wrap them across your crown from ear to ear. The result feels effortless yet polished—perfect for those winter events where you want to look put-together.
Start with damp hair. Spray on a texturizing product like Bumble and bumble Thickening Full Form Mousse. This gives you grip without any damage. Section your hair at the temples. Twist each piece away from your face. Secure with bobby pins as you wrap around.
Celebrity hairstylist Sarah Potempa loves this trick: “Crown braids work beautifully on second-day hair with natural texture.” Your hair type doesn’t matter here. Your length doesn’t either. Those loose twists create dimension all on their own—no perfect sections required.
Four-Strand Braid: Master Advanced Texture
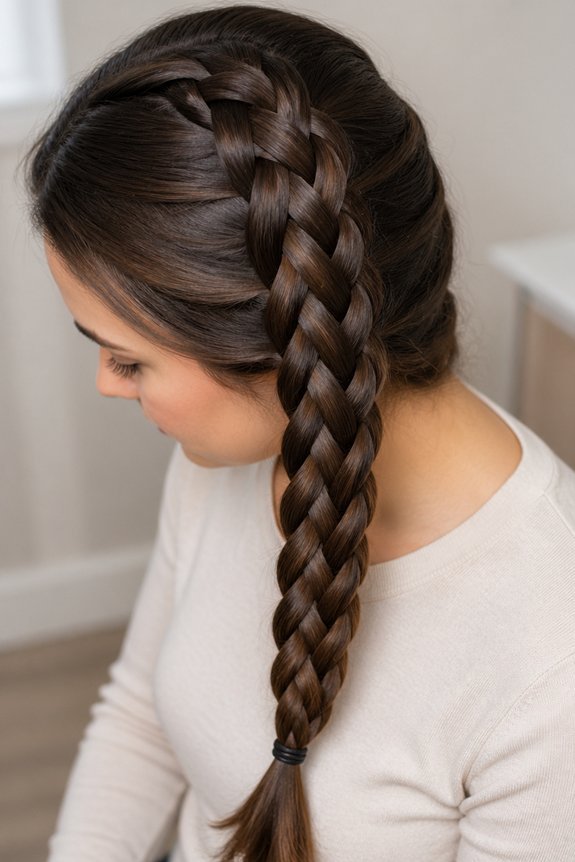
Ready to level up your braiding game? The four-strand technique looks intimidating, but you’ve got this. It’s just one extra section, and the payoff is huge—sculptural waves that regular braids simply can’t touch.
Start with damp hair. Grab a texturizing mousse for grip. Now divide your hair into four equal pieces. Here’s the pattern: take strand one, cross it over two, then tuck it under three, then over four. Repeat. Crown to ends. Slowly. The rhythm clicks after a few tries.
See that depth happening? That’s the magic. No flat plaits here. Once you’re done, gently tug and tousle for that effortless, lived-in vibe. Hairstylist James Van Der Zee swears by this method for winter events—polished but textured, sophisticated but relaxed. Perfect for when you want to look like you tried without looking like you tried too hard.
Braided Waves: Damage-Free Overnight Curls
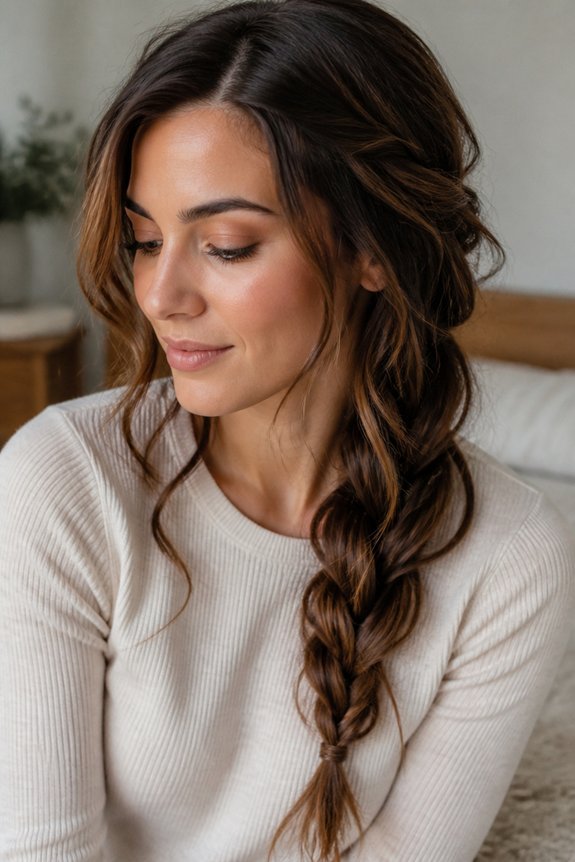
Tired of waking up with boring, flat hair? You can fix that tonight.
Braid your damp hair before bed. Two to four loose braids work best. The looser you braid, the softer your waves will look. Tight braids? You’ll get crimped, not cute.
Prep your strands first. Mist them with leave-in conditioner or sea salt spray. This locks in moisture and helps waves hold their shape. Skip the metal clips—they leave creases. Use soft elastic bands instead.
Celebrity stylist Marcus Webb swears by this trick. “Braided waves balance intention and natural texture,” he says.
In the morning, don’t rush. Unravel each braid gently with your fingers. No combs allowed. You’ll keep the wave pattern smooth and frizz-free. Touch your hair. Soft, dimensional, zero heat damage.
You just slept your way to gorgeous waves.
Frequently Asked Questions
How Long Do Winter Braids Typically Last Before Needing to Be Redone?
Winter braids typically last between two to four weeks before requiring maintenance or redoing, depending on hair type, braid tightness, and daily activities. Individuals with slower hair growth may extend this timeline, while those with active lifestyles may need earlier renewal.
What Hair Products Work Best for Keeping Braids Secure in Cold, Dry Weather?
Anti-frizz serums and lightweight oils effectively secure winter braids in cold, dry conditions. Beeswax-based products, leave-in conditioners, and moisture-locking sprays prevent breakage and flyaways. Regular moisturizing treatments strengthen hair, reducing slippage. Gel provides extra hold without weighing braids down during harsh weather.
Can Braids Damage Hair, and How Do I Minimize Potential Breakage?
Braids can cause damage if too tight, pulling hair roots excessively. To minimize breakage, one should keep braids loose, avoid frequent styling, moisturize regularly, use protective products, and give hair periodic rest days between braiding sessions.
Which Braid Styles Work Best for Fine or Thin Hair Types?
Individuals with fine or thin hair benefit most from loose, three-strand braids and Dutch braids, which distribute tension evenly. French braids work well too. Avoiding tight styles prevents breakage, while textured products add volume and grip before braiding.
How Do I Prevent Frizz and Flyaways When Wearing Braids in Winter?
One should apply smoothing serum or anti-frizz cream before braiding. Using a fine-tooth comb guarantees neat sections. Securing braids with elastic bands and finishing with hairspray tames flyaways effectively throughout winter months.
Conclusion
Winter braids offer protective styling that combats harsh weather while elevating everyday looks. From Dutch braids’ textured appeal to crown styles’ refined elegance, these techniques work across all hair types and occasions. Mastering varied braid patterns—whether intricate four-strand designs or effortless rope styles—requires practice and quality products like smoothing serums and flexible hold sprays. Each style delivers both functionality and fashion, making braids winter’s most versatile hair solution.