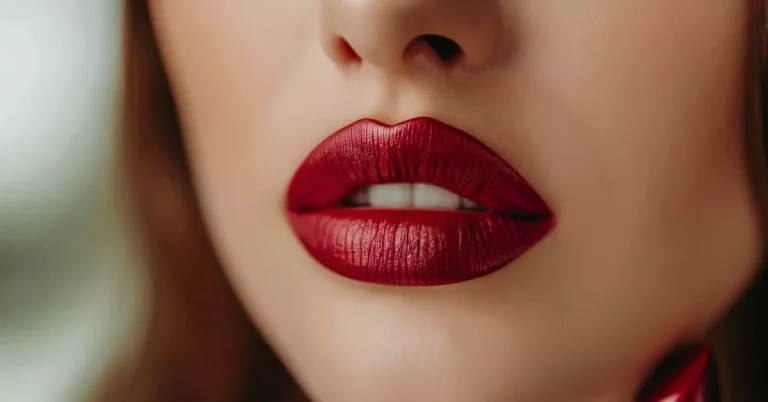
I’ve always believed that lipstick is the little black dress of the beauty world. A single swipe can completely transform your mood and make you feel instantly put together.
Over the years, I’ve experimented with everything from deep vampy shades to soft, natural pinks, and if there’s one thing I’ve learned, it’s that no matter the color, a well-applied lipstick can boost your confidence like nothing else.
Today, I’m going to break down exactly how to apply lipstick so it actually lasts, looks smooth, and makes you feel amazing.
How to Apply Lipstick (Step-by-Step)
1. Prep Your Lips
I can’t stress this enough: your lipstick is only as good as the base you put it on. My husband, who happens to be a dermatologist, always says, “Healthy skin first, makeup second.”
He loves to remind me of that every time he sees me scrubbing my lips with some DIY concoction.
Start by exfoliating your lips to remove dead skin and flakiness. You don’t need to buy an expensive scrub — a simple mix of sugar and honey or gently rubbing your lips with a soft toothbrush will do the trick. Massage lightly in small circles for about a minute, then rinse.
After exfoliating, apply a nourishing lip balm and let it sink in. This step makes a massive difference in how your lipstick sits and wears throughout the day.
If you skip it, even the best lipstick will cling to dry patches and settle into lines.

2. Prime for Longevity
If you want your lipstick to last past your first cup of coffee, priming is your secret weapon.
You can dab a small amount of foundation over your lips to neutralize your natural lip color and create a smooth, blank canvas. This also helps the lipstick color appear more true to the tube and stay put longer.
Make sure you use just a thin layer, and allow it to set for a minute before moving on.
3. Outline with Lip Liner
Lip liner isn’t just an old-school step from your mom’s makeup routine. It’s essential for defining your lips and preventing your lipstick from feathering or bleeding.
Start by outlining your cupid’s bow, then move to the corners, and finally connect the lines smoothly along the edges of your lips.
If you want your lips to look a bit fuller, you can slightly overline them, but keep it subtle.
Nothing ruins a look faster than an obvious overdrawn lip. Choose a liner that matches your lipstick shade for the most seamless look, or use a nude liner for a softer finish.
You can also fill in your lips completely with the liner to create a strong base and extend the wear time even more.
4. Apply Lipstick Carefully
This is where most people rush and then wonder why their lipstick looks messy ten minutes later. Start applying from the center of your lips and work outward toward the edges.
Use thin, controlled strokes to avoid uneven patches.
You can use the lipstick bullet directly, but if you really want that precise, makeup-artist finish, a lip brush makes a world of difference.
It gives you more control over the edges and helps you build up color gradually.
5. Blot and Reapply
Once you’ve applied your first layer, take a tissue and gently blot your lips. This removes any excess product and presses the pigment into your lips for better staying power.
After blotting, apply a second thin layer of lipstick.
This layering technique gives you a richer, more vibrant finish and helps your color last longer without constantly needing touch-ups.
6. Clean Up Edges
For that sharp, clean finish, use a small brush dipped in a bit of concealer to tidy up around the edges of your lips.
This step makes a big difference, especially if you’ve used a bold or dark shade. It creates a crisp border and helps your lips stand out beautifully.
A cotton swab can also work if you don’t have a brush handy, but be gentle so you don’t accidentally smudge your hard work.
Hacks for Flawless Lipstick
- Powder between layers: Lightly dust translucent powder through a tissue after your first coat. Sets the color like a charm.
- Nude eyeliner trick: Outline your lips with a nude pencil to stop color from bleeding. Works like a force field.
- Highlight that cupid’s bow: A dab of highlighter on the cupid’s bow instantly makes your lips look more defined and juicy.
- Gloss only in the center: Want that plump, “just kissed” look? A touch of clear gloss in the center does wonders.
Conclusion
Lipstick is personal. Maybe you’re a bold red girl, or maybe you love a barely-there pink. There are no rules—just opportunities to play and express yourself.
I always say: wear it for you, not for anyone else. And remember, confidence is the ultimate finishing touch. No liner or gloss can fake that.
So go ahead, experiment, smudge, laugh, reapply—and don’t forget to snap a selfie (or three).