
Travel puts nails through more than most situations do. Saltwater, sunscreen, frequent handwashing, and days that run longer than planned all take a toll in ways a regular week at home simply doesn’t. That context is worth factoring into the choice before you pack.
The practical argument for keeping vacation nail art relatively streamlined is not about aesthetics, it’s about longevity. A clean, well-applied design in a forgiving shade will still look intentional on day seven. An elaborate set that starts lifting or chipping by day three creates a different kind of problem when you’re nowhere near your usual salon.
That said, vacation is also one of the more natural contexts for wearing something bolder or more decorative than you might reach for ordinarily. The change of scenery genuinely does change what feels appropriate, and a design that might seem like too much effort for a regular Tuesday can land exactly right against a beach backdrop or a city you’ve never been to before.
The sixteen styles here were chosen with both considerations in mind. They cover a real range in terms of color and complexity, but each one holds up through the kind of daily wear that travel demands. Where maintenance matters, the relevant tips are included alongside the design rather than saved for a separate section.
Get Ocean-Inspired Designs for Beach Escapes
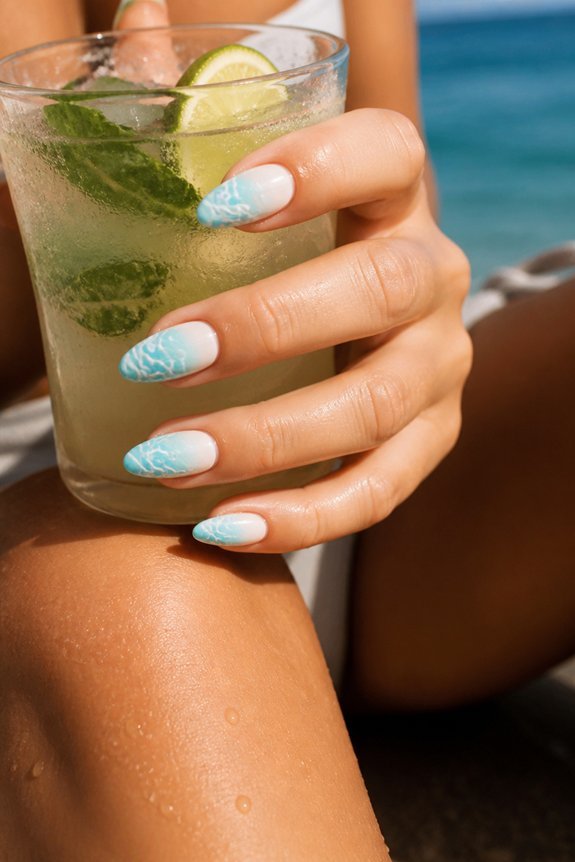
Beach season calls for nails that feel like the ocean itself. Think aqua blues and seafoam greens as your starting point. These calming colors set the perfect coastal vibe.
Ombre techniques let you blend water tones across your nails smoothly. Add tiny hand-painted starfish or shells for that extra detail. Gel polish keeps everything intact against saltwater and sand.
Navy to turquoise gradients work beautifully for underwater scenes. Layer shimmer over solid colors to create depth and movement. Silver or pearl metallic accents give you wave-like highlights that catch the light.
White striping looks just like ocean foam and crashing waves. A matte topcoat balances any glossy elements so nothing feels overdone. These designs work for beach days and evening dinners alike.
Go Earthy: Mountain Retreat Nails in Stone and Sage
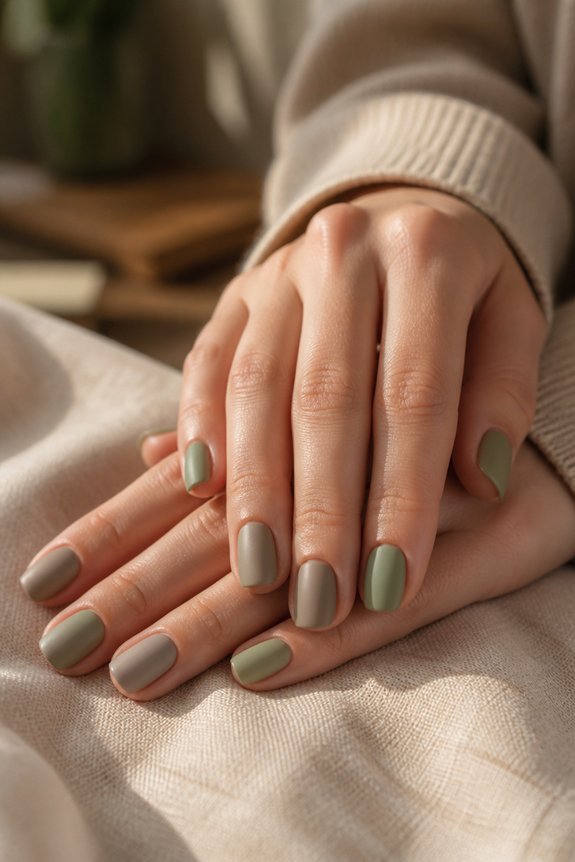
Why skip bright summer shades? Stone and sage tones actually nail that mountain feeling. Warm grays, soft greens, and terracotta bring nature straight to your fingertips.
Start with OPI’s “Peace of Mind” as your base. It’s a neutral stone shade that works beautifully. Layer sage green on your accent nails next.
Here’s where matte finishes shine. They create soft texture and reveal your nail shape naturally. Just keep your application clean since matte shows everything.
Think minimalist and modern. A thin gold line down the center looks elegant without trying too hard. Geometric patterns work great too if you prefer more detail.
Mix glossy and matte nails for extra visual interest. Some nails shiny, others soft. This combo adds depth and keeps things fresh.
Ridge-filling base coats make all the difference. Smooth surfaces mean your design lasts longer and looks crisp. These designs pair perfectly with hiking boots or cozy cabin weekends.
Also read: 11 Fun Summer Nails That Are Basically a Vacation in a Polish
Choose Bold Geometry for City Adventures
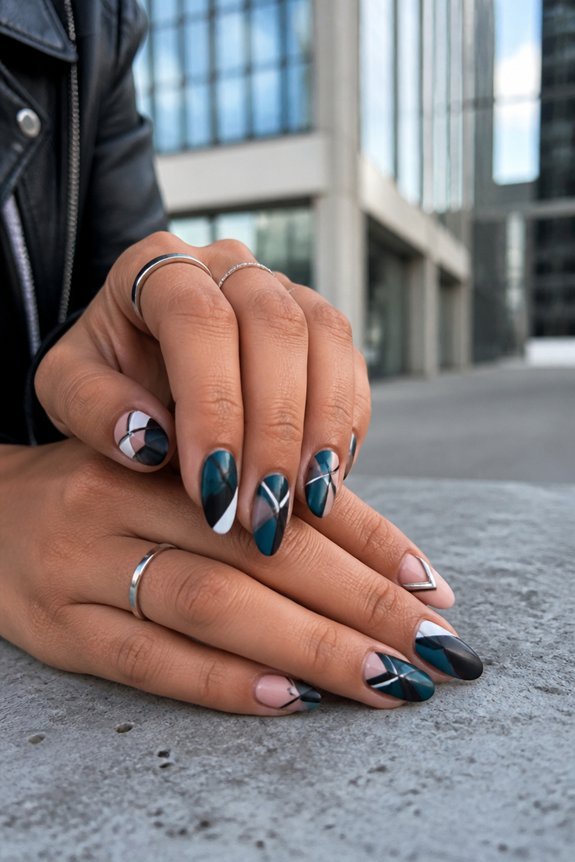
Urban exploration is all about making a statement. Geometric nails do exactly that with modern patterns that pop against concrete and glass backdrops. Think bold triangles, clean lines, and color-blocking that actually looks good in photos.
Start simple with black and white designs. Essie’s “Licorice” paired with crisp white creates instant graphic impact. These designs work for any occasion, from coffee runs to night outs.
Gold accents take geometric designs up a notch. Try adding metallic details with OPI’s “Princesses Rule” to elevate your look. Negative space designs feel fresh and intentional without being too much.
Layer sheer bases under opaque geometric shapes for depth. This technique keeps your manicure looking polished even during busy weekdays. You get visual interest without overwhelming your hands.
Sunset Gradient Nails for Instagram-Worthy Vacation Photos
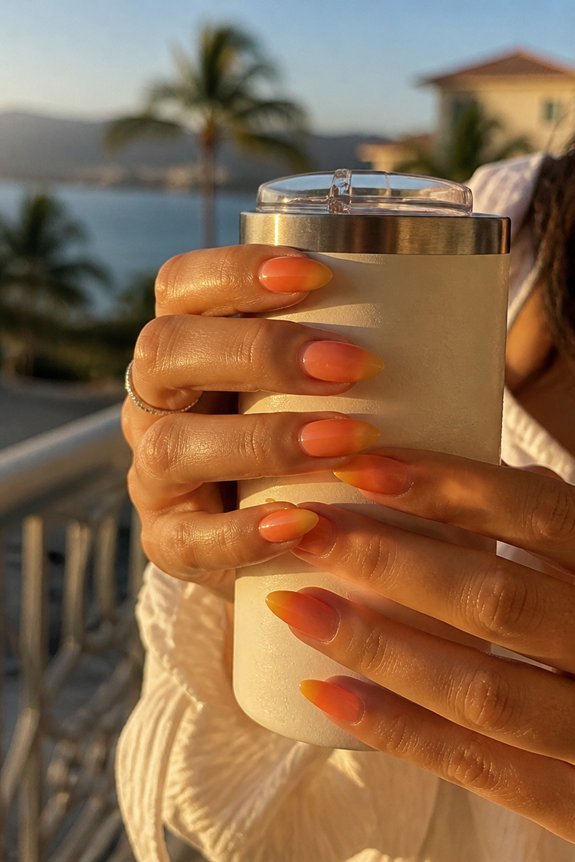
Ombré shifts from warm oranges to soft pinks create vacation magic on your fingertips. This gradient technique captures sunset light perfectly for beach photography. You’ll blend three complementary shades: coral, peach, and rose using a makeup sponge and gentle dabbing motions.
Sally Hansen Miracle Gel in “Sunset Dream” works great as your base color. A professional-grade sponge guarantees seamless color shifts without harsh lines. Finish with glossy topcoat to add dimension and make your manicure last longer.
Gradient nails photograph beautifully in natural lighting because they reflect multiple tones at once. This technique looks stunning on any nail shape, from almond to square. Summer travelers love how sunset gradients transform casual poolside looks into polished vacation moments.
Also read: 15 Summer Acrylic Nails That Look Like Pure Art
Minimalist Summer Nails for Clean, Understated Style
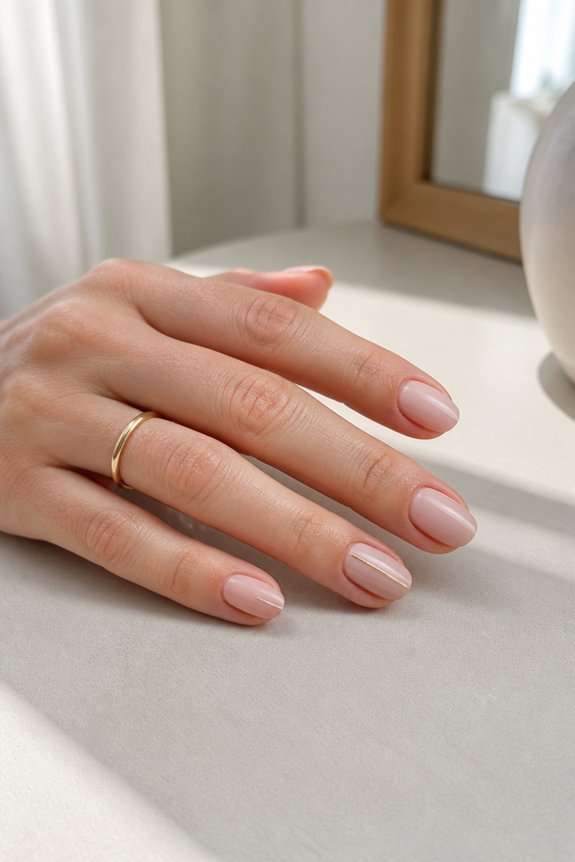
Less really is more with summer nails. Soft beige, crisp white, and barely-there blush create that polished vacation vibe without trying too hard.
Try a single accent nail with minimalist line art. It adds interest while keeping things clean and simple. Two thin coats work better than one thick layer for the best finish.
Negative space designs are your friend here. Leave parts of your nail bare and add thin metallic stripes or small geometric shapes. Your hands stay looking sophisticated all summer long, whether you’re at the beach or exploring a new city.
The best part? These designs don’t need constant touch-ups. Your nails stay healthy and strong while looking effortlessly put together.
Make Neon Pop in Every Vacation Photo
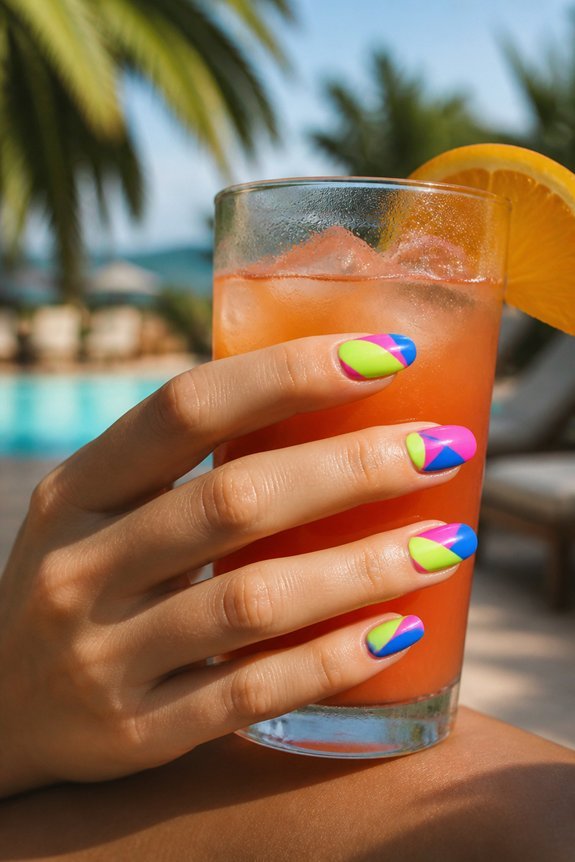
Your nails can be the star of every vacation shot. Neon polish turns hands into eye-catching focal points that stand out against sand, water, and tropical scenery.
Electric lime, hot pink, and sunshine yellow create instant wow factor. These shades pop naturally in sunlight without needing filters or editing tricks.
OPI’s Neon Collection and Essie’s Neon line both pack serious pigment. Two coats give you the saturation needed for photos that look vibrant and intentional. Your manicure stays bold throughout your entire trip too.
Neon shades actually appear brighter on camera than in person. That means what looks good on your nails will look even better in pics. Pro nail artists use this trick all the time for social media content.
Try layering neon bases with metallic touches for extra depth. Chrome tops or gold leaf details add interest without clashing with your bold base color.
A matte topcoat keeps glare down in bright sunlight while keeping your color punchy. Skip the glossy finish if you’re shooting in direct light. Your nails will photograph crisp and clear every time.
Tropical Fruit Nails for Island Getaway Vibes
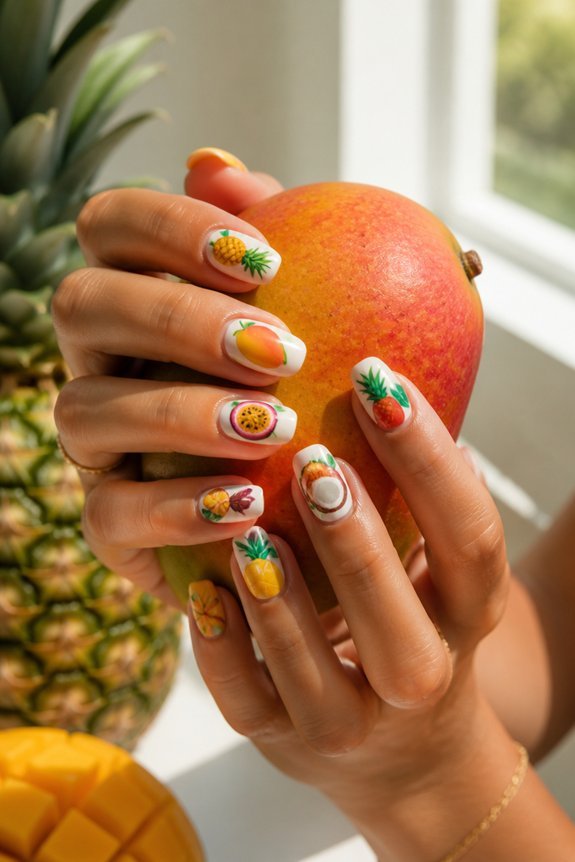
Tropical fruit designs bring island vibes right to your fingertips. Think juicy watermelons with bold reds, pinks, and tiny black seeds. Pineapples work great too with their sunny yellows and greens.
Start with OPI’s “Sugarplum” as your base color. Use thin nail art brushes to paint your fruit details carefully. A glossy gel topcoat makes everything look fresh and shiny, just like real fruit.
Longer nails give you more space to create intricate designs. Add micro-rhinestones or chrome accents for extra sparkle and dimension. Try matte topcoats on a few nails to mix textures and make your design pop.
Gold and Silver Metallic Accents for Resort Sophistication
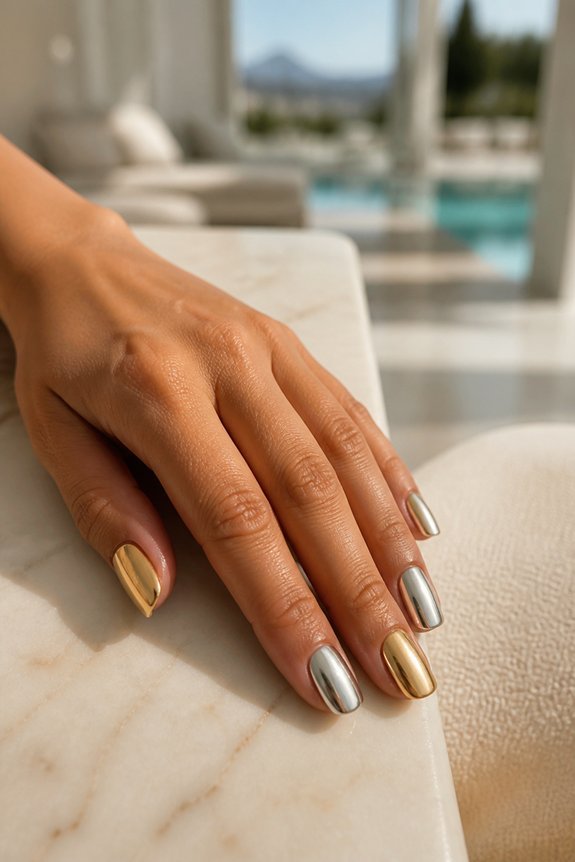
Metallic finishes instantly upgrade your nails from everyday to resort-ready. Gold and silver accents are your secret weapon for that luxe look.
Try layering metallic polish over a nude base. This keeps things elegant without being too much. Chrome powders create that gorgeous mirror effect that catches everyone’s attention.
Apply thin, even coats for the best shine and reflection. Use a thin brush to add metallic stripes for precision. Pair gold with white for a crisp, polished vibe. Silver looks stunning next to soft pastels or deep ocean blues.
Quality matters here. Invest in a good metallic collection that lasts through your vacation. Top it off with a glossy coat to add dimension and sparkle.
Get creative with geometric metallic lines for a modern twist. Try blending gold into silver for a gradient effect. These touches make your everyday style feel like a five-star resort experience.
Floral and Palm Leaf Patterns for Resort Wear
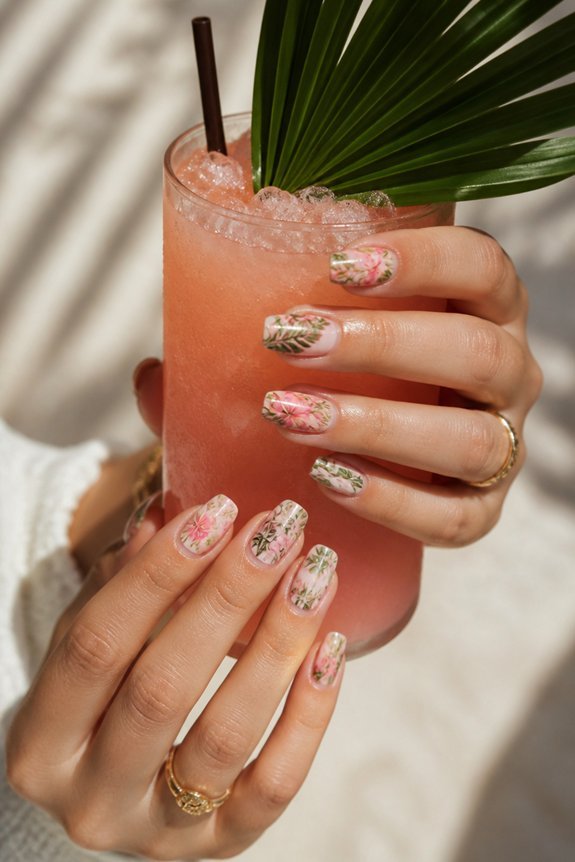
Think tropical botanicals belong only on beach dresses? Think again. Your nails can tell the same vacation story. Hand-painted hibiscus blooms work wonderfully as the star of the show on cream or soft pink bases. Palm fronds add interest too, using negative space to let your natural nail color peek through.
Layer sheer petal tones over solid backgrounds for depth and dimension. A glossy gel topcoat keeps everything protected during beach days and pool time. These patterns look equally stunning on short nails or long ones, so everyone can rock them.
Ombre Nails in Soft Pastels for Relaxed Getaways
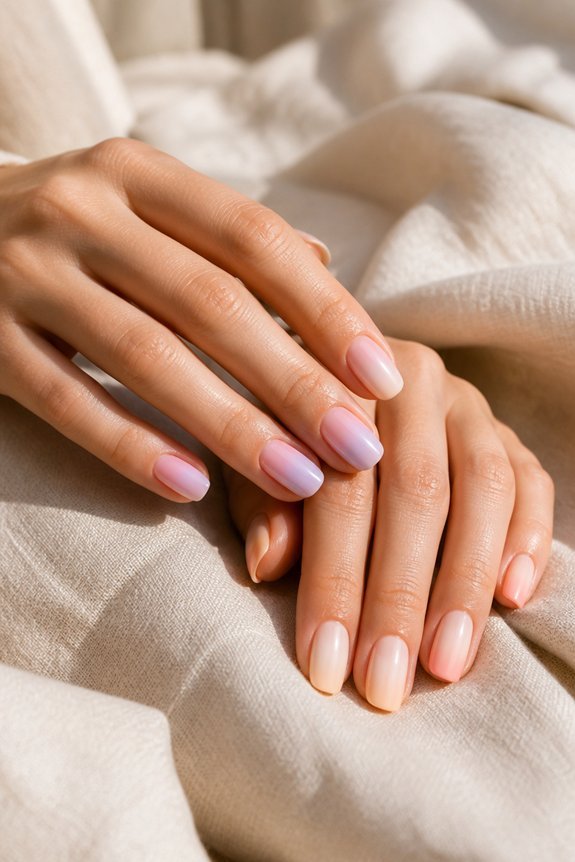
Ombre nails give you that soft, dreamy look without going bold. The technique blends two or more pastel shades across your nail. Think peachy-to-cream for beach vibes or lavender-to-white for calm elegance.
Here’s how to create them: grab a makeup sponge and dab the polish onto your nail instead of brushing it on. Use quality gel polishes like Gelish or OPI’s soft pastels for the best blending. Finish with a top coat to seal everything and make the gradient shine.
These manicures look great at resorts and photograph beautifully. They work on any nail length or shape without looking over-the-top. You can go from the pool to dinner without touching them up.
Polka Dot and Stripe Combos for Casual Beach Days
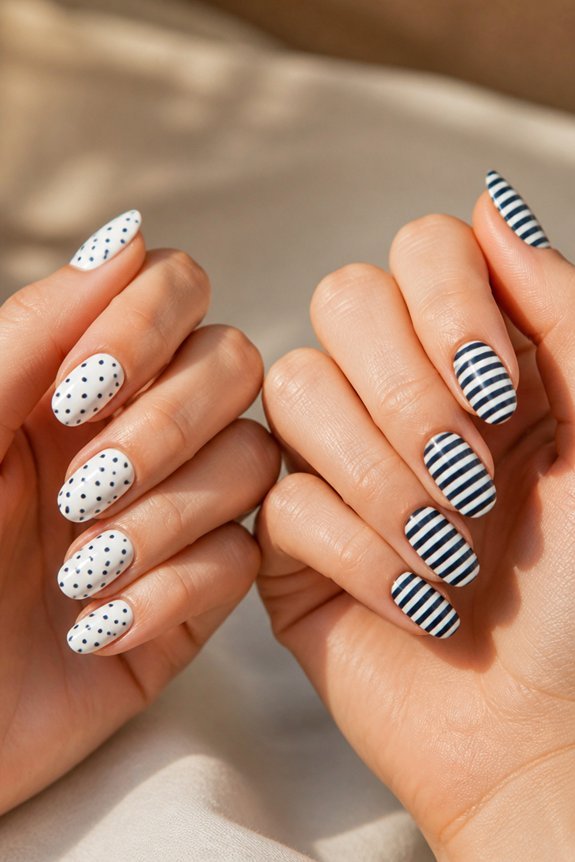
Polka dots and stripes bring fun energy to your summer nails. They’re way more playful than soft ombre designs and show off your personality.
Start with a crisp white or pale yellow base. Use a dotting tool to add navy or coral polka dots for clean, even coverage. Try horizontal stripes on one or two accent nails to keep things interesting without going overboard.
The key to mixing patterns? Pick two colors that work together. This keeps your design cohesive and prevents clashing.
OPI’s “Samoan Sand” works beautifully as a neutral backdrop for patterns. Top it with Sally Hansen’s Quick Dry topcoat to lock in your design and protect those details. You’ll get that fresh, easy vibe that’s perfect for beach days and poolside hangs.
Marble Nails That Look High-End and Effortless
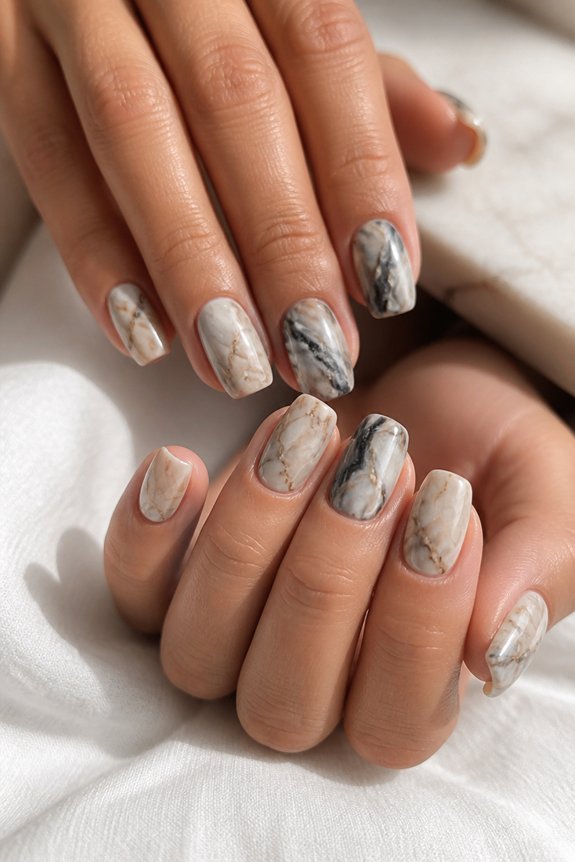
Marble nails deliver sophistication without requiring hours at the salon. This technique uses swirled patterns of contrasting polish colors to create a luxurious, stone-like finish that works year-round.
Start with a white or cream base coat. Apply thin veins using black, gray, or metallic polish with a thin brush or toothpick. Swirl the lines gently across the nail surface for natural-looking patterns. The secret is restraint. Less is more with marble.
Sally Hansen’s Miracle Gel provides excellent color saturation for marble designs. Essie’s Argan Oil top coat seals the look while adding dimension.
Summer marble nails benefit from pastel bases paired with nude or taupe veining. This combination feels effortlessly elegant for beach trips and casual dinners. The technique requires minimal time investment while delivering high-end results.
Shine at Night: Glitter and Shimmer Designs
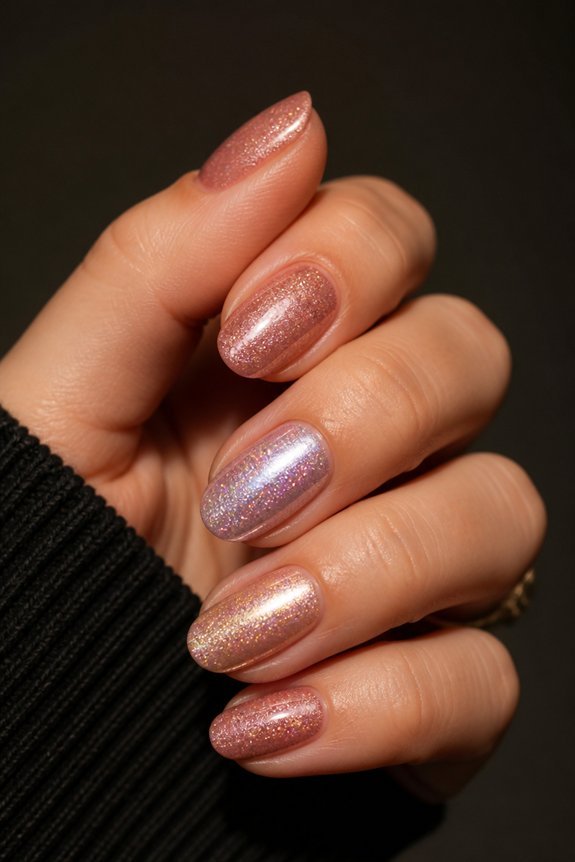
Glitter and shimmer nails bring the sparkle factor that marble designs skip. They’re perfect when you want your nails to catch every bit of light at parties or beach days.
Getting Glitter Right
Fine micro-glitter creates smooth gradient effects. Chunky glitter gives you that bold, dimensional pop. The trick is applying it to a wet top coat so it sticks perfectly and shines like crazy.
Shimmer as Your Subtle Option
Chrome powders and iridescent finishes give you shine without going full glitter mode. They bounce light around beautifully and look especially stunning in photos. You get movement and elegance combined.
Layering for Maximum Impact
Try pairing a nude base with gold shimmer on top. Or go darker with jewel tones and add holographic dust. Gel formulas like Gelish and Orly keep everything locked in place longer, so your design stays flawless through your whole trip.
Paint-Free Elegance: Negative Space Nail Designs
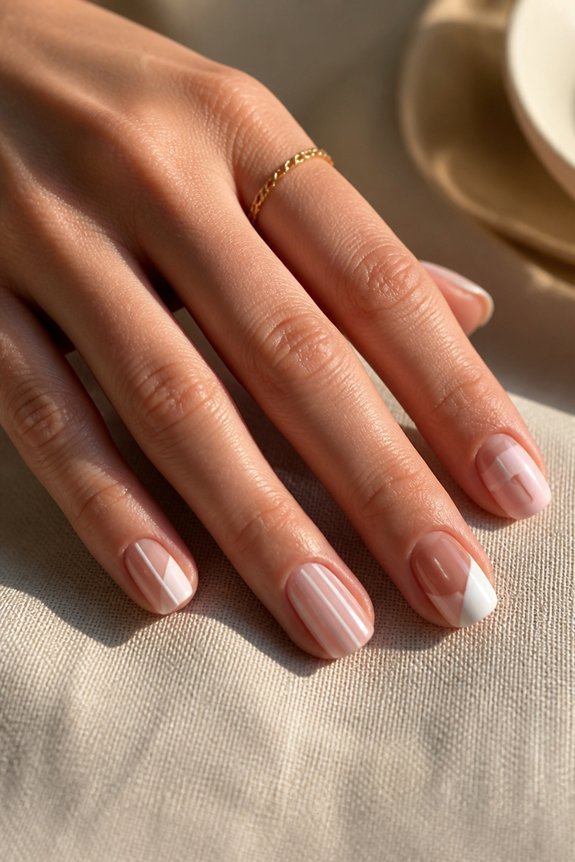
Love the idea of showing off your natural nails? Negative space designs do exactly that. You leave parts of your nail bare while adding thin gold or silver lines around the edges. The result feels modern and fresh without looking overdone.
Geometric patterns shine with this approach. Try half-moon shapes at your nail base or tips for clean, understated elegance. This style works on short nails and long nails alike, so don’t worry about your nail length.
Want something that won’t need constant fixing? This is your answer. Negative space designs demand way less maintenance than full coverage nail art. Summer trips are perfect for trying this out.
Gel polish keeps your edges crisp and your design lasting longer. Essie’s minimalist collection offers great options for precise, clean application. You get polish and refinement without the constant upkeep.
Watercolor Nails: Painted Vacation Vibes
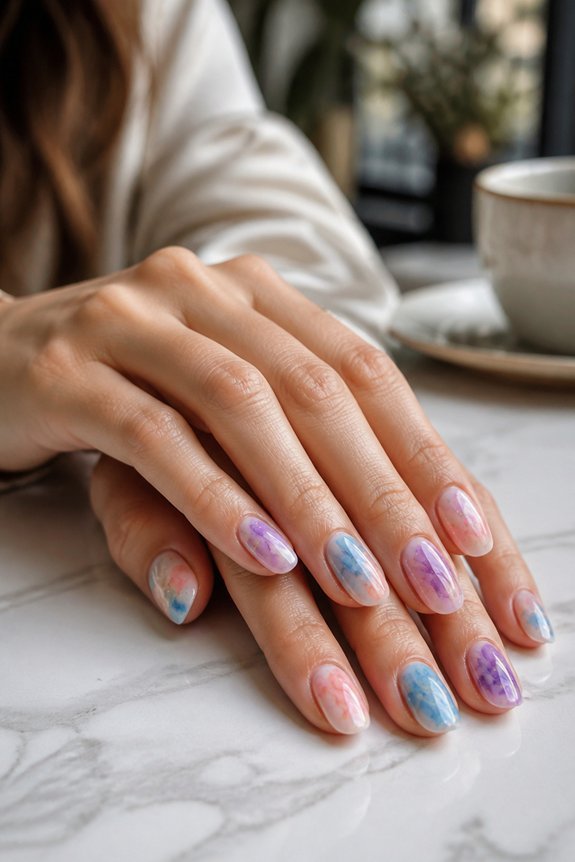
Want that dreamy summer feeling on your nails? Watercolor designs do exactly that. They blend soft colors into organic, blurred patterns that look like tropical sunsets and ocean horizons.
The magic happens when you apply pigmented polish to wet surfaces. Colors naturally diffuse and merge, creating that painted vacation effect. Soft corals, seafoam blues, and peachy tones are perfect for this look.
You’ll need diluted gel polish or watercolor-specific products like Gel-X tips with translucent bases. Layer 2-3 complementary shades gradually to build depth. A top coat seals everything while keeping that painterly quality intact.
Here’s the best part: imperfection is your friend. The randomness is what makes watercolor nails feel authentic and travel-inspired. Your results will look both polished and effortlessly artistic, bringing summer wanderlust right to your fingertips.
Keep Your Nails Looking Fresh: Travel Maintenance Hacks
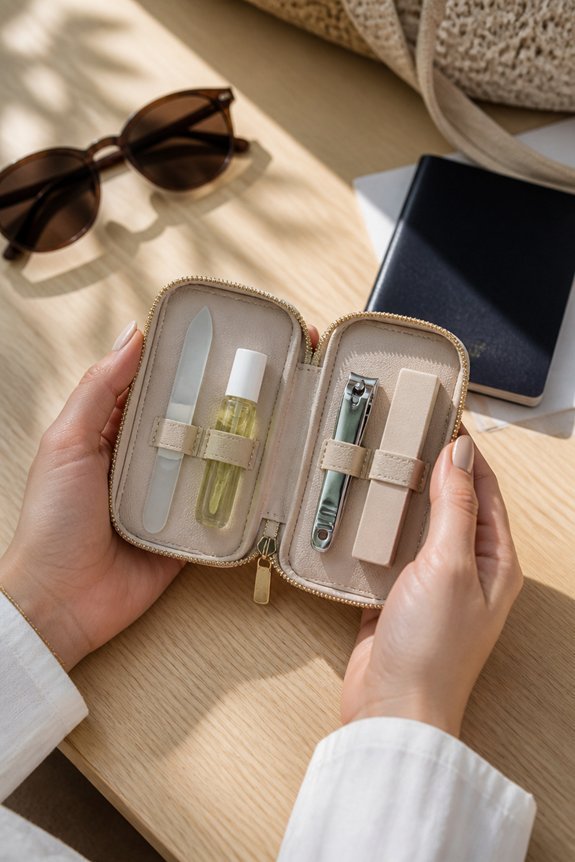
When vacation plans involve sun, sand, and adventure, nail maintenance becomes essential to preserving that fresh watercolor look. Pack a portable nail kit with a glass file, cuticle oil, and quick-dry topcoat. These three items cover most nail emergencies on the road.
UV exposure fades polish fast, so reapply SPF-formulated topcoats every three days to keep your color vibrant. Hydration is your first defense against vacation damage. Moisturize your cuticles regularly to prevent peeling and brittleness from chlorine and saltwater.
Bring acetone-free nail wipes for quick touch-ups when you don’t have water access. A strengthening base coat protects against environmental stressors before you add decorative layers. Sand-resistant formulas hold up better at the beach than traditional polishes.
Store your products in climate-controlled compartments to prevent separation. This simple step keeps everything in working order. Your nails stay camera-ready throughout summer travels without needing full salon visits.
Frequently Asked Questions
How Long Do Nail Designs Typically Last During a Week-Long Vacation Trip?
Nail designs typically last five to seven days during a week-long vacation trip. Traditional polish may chip within three to five days, while gel manicures extend durability to two weeks. The longevity depends on nail design complexity and daily activities.
What’s the Best Nail Polish Brand for Travel That Won’t Chip Easily?
A traveler returning from a two-week Caribbean cruise reported flawless nails throughout. Gel-based formulas like Shellac and Builder Gel resist chipping during extended trips, offering durability superior to traditional polish while maintaining vibrant color.
Can I Apply These Designs Myself or Do I Need a Professional?
One can apply simpler designs independently with practice and proper tools, though intricate patterns typically require professional expertise. Beginners should start with basic techniques, while complex vacation-themed nail art designs benefit from a skilled technician’s precision and experience.
How Do I Remove Vacation Nail Designs Without Damaging My Natural Nails?
As the saying goes, “haste makes waste.” One should soak nails in warm water with acetone for ten minutes, gently push polish away using a wooden stick, and avoid picking or peeling. This patient approach prevents damage to the natural nail bed underneath.
Which Nail Designs Work Best for Activities Like Swimming and Hiking?
Short, rounded gel designs with matte finishes work best for swimming and hiking. These withstand water exposure and physical activity well. Avoiding long acrylics prevents breakage during outdoor adventures, while neutral tones mask dirt effectively.
Conclusion
Whether travelers choose understated minimalist designs or bold geometric statements, summer nails demand versatility. Ocean blues clash beautifully against earthy mountain tones, while glitter designs contrast sharply with negative space elegance. The key lies in matching nail art to your destination’s energy while maintaining polish integrity through travel’s demands. Strategic maintenance guarantees your chosen aesthetic stays camera-ready, transforming nails into portable vacation memories that outlast the trip itself.